RV Road Trip Planner: Routes, Stops, Fuel and Campgrounds
Build an RV road trip planner for routes, fuel stops and campgrounds with a practical worksheet, tool stack and backup plan. Start planning.

Quick answer: An RV road trip planner is more than a line between two pins. Start with your measured rig profile, set a daily drive limit, choose anchor stops, build an RV-aware route, calculate fuel range, check the exact campsite and final approach, then save a backup. Posted signs, current official restrictions, law-enforcement instructions, and campground operator directions always outrank an app or worksheet.
The best plan is the one you can still use when the weather changes or the campground office closes early. This guide gives you a repeatable workflow, a tool-stack decision table, formulas for fuel and budget, and a workbook with seven functional planning tabs plus a dashboard. For broader destination and seasonal ideas, see the ONNAIS RV travel guide.
Operational source check: August 16, 2026. Tool features, plan prices, reservation rules, road conditions, weather, campground inventory, and product specifications can change. The public route-tool test in this article is labeled carefully because a preview route is not the same thing as a route checked against a specific RV.
How this guide was made: The workflow combines the supplied ONNAIS product knowledge, public planner pages, official source roles, and a visible logged-out route preview. It is an editorial planning guide, not a personal trip report or a substitute for current road-owner instructions.
Download the RV road trip planner worksheet or download the printer-friendly RV road trip planner worksheet PDF.
Set Up Your RV Road Trip Planner in 10 Minutes
Here is the short version of how to plan an RV road trip. You can finish this first pass before choosing a single scenic stop.
- Record the rig. Measure travel height, width, connected length, and the weight field your routing tool asks for. Include roof equipment, racks, mirrors, and the tow or towed vehicle.
- Set the human limits. Choose your preferred daily drive time, latest acceptable arrival, rest-stop rhythm, and dates that cannot move.
- Choose anchor stops. Mark the campground, event, park entrance, or family visit that controls the trip. Reserve the least flexible night first.
- Build RV-aware legs. Enter the actual profile into an RV route planner, then save the route name and warnings in the workbook.
- Place fuel and rest stops. Use conservative planning MPG and leave room for detours, grades, wind, generator use, and a station that cannot take a large rig.
- Verify the last mile. Check the official road owner, campground directions, final turns, low clearance, bridge limits, grades, and current access rules.
- Save Plan B. Add one alternate route, one alternate overnight, a decision deadline, and the fuel and reservation consequences of switching.
The full sections below expand each step. The workbook keeps the decisions together so you do not have to reconstruct the trip from six apps and a half-charged phone.
Build Your Rig and Trip Profile Before Opening a Map
An RV route planner needs better inputs than a passenger-car map. Use the owner manual, door labels, scale tickets, and actual measurements. Guessing is how a roof air conditioner becomes a low-clearance story.
| Profile area | Record this | Why it matters |
|---|---|---|
| Rig | Type, travel height, travel width, connected length, loaded or rated weight field requested by the tool | Filters route restrictions and campsite fit |
| Rig | Fuel type, tank capacity, conservative planning MPG, propane carried | Sets fuel range and resupply decisions |
| Driver | Preferred daily drive time, latest arrival, break rhythm, mountain or city comfort | Turns miles into a day you can actually finish |
| Trip | Dates, non-negotiable reservations, travelers, pets, accessibility needs | Controls anchors, backups, and arrival timing |
| Camp setup | Hookups, amp service, sewer or dump needs, slide and awning clearance | Eliminates campsites that look available but do not fit |
Measure the maximum travel height, not just the box height. Include rooftop air conditioners, satellite equipment, vents, solar panels, racks, and anything that can flex upward. Record the widest travel condition, connected length from front-most to rear-most point, and the weight number appropriate to the tool. A trailer body length is not the same as connected length.
Write down propane carried and any route-specific concern that applies to your trip. A restriction in a tunnel, ferry, park, or local road may depend on the current operator or road owner. Do not turn a general note about propane into a universal rule.
The driver profile matters just as much. A route can be legal for the equipment and still be a poor choice for a tired driver facing a long grade or tight urban turns. Set a preferred daily drive time and a latest arrival time before a map rewards you for adding one more stop.
Keep this data in the cab and in the workbook. I would rather check one honest measurement twice than discover a guessed number at a sign with nowhere useful to turn around.
Choose a Tool Stack, Not One Perfect App
There is no universal winner because each planning role answers a different question. A good RV trip planner combines a route engine, a map for inspection, official sources for current restrictions, a campground operator page, a weather source, a fuel calculator, and one master record.
| Planning role | Suitable tools | RV profile support | Campground or service layer | Official-source status | Free, trial, or paid status | Best use | Limitation |
|---|---|---|---|---|---|---|---|
| RV-aware route engine | RV LIFE Trip Wizard; AdventureGenie; Good Sam Trip Planner | Use the current plan's vehicle-profile fields; confirm exactly what is filtered | Varies by product and membership | Not the final authority for closures or posted limits | Check the current plan page before publication | Create a route that considers RV constraints and daily pacing | A missing warning is not proof that a road fits |
| General map and satellite inspection | Google Maps or another general map | Usually not a complete RV profile | Broad places and traffic layers | No | Free or account-dependent features vary | Inspect the final mile, turns, terrain, and nearby services | Passenger-car routing can ignore height, weight, length, propane, or grade concerns |
| State, park, forest, or local road source | State 511, DOT, NPS, forest or county road owner | Not a route planner | Current notices for the roads they manage | Source of record for the relevant restriction | Usually public | Verify closure, construction, pass, bridge, and access status | One agency does not cover every road on a multi-state leg |
| Weather forecast | National Weather Service and local alerts | Forecast is not a vehicle-fit verdict | Alerts and forecast discussion | Official forecast and warning source | Public | Check wind, snow, flood, fire, heat, and storm timing | Do not invent a universal RV wind or snow threshold |
| Campground discovery and booking | Recreation.gov, campground operator, park concessioner | Fit depends on the exact site and approach | Reservation, site type, rules, contact details | Operator or managing agency is the authority | Availability and fees change | Confirm site length, hookups, arrival, cancellation, and directions | A campground-wide maximum does not make every site suitable |
| Fuel and trip math | FuelEconomy.gov trip calculator plus your own workbook | Uses editable MPG and price inputs | Stops and resupply are your responsibility | Price and inventory need current local checking | Public calculator; prices vary | Estimate gallons, cost, and stop spacing | A listing does not guarantee large-rig access or current fuel |
| Master record | ONNAIS seven-functional-tab workbook plus dashboard | Stores your measured inputs and decisions | Keeps primary and backup reservations together | Records URL, evidence, and checked time | Downloadable workbook and printable PDF | Preserve the plan and expose open checks | It does not receive live traffic or override a posted restriction |
RV LIFE Trip Wizard's public feature page says it customizes RV-safe routes to the height and weight of the RV and can show campgrounds, gas stops, and points of interest. AdventureGenie describes vehicle profiles, daily-distance preferences, campground matching, and routes tailored to vehicle type. Those are useful capability signals, not evidence that a particular route fits your rig today. Check the current plan and feature pages when you publish.
Use the stack in this order:
- Build the first route in an RV-aware tool.
- Inspect the final approach in a general map or satellite view.
- Open the road-owner and land-manager pages for each critical segment.
- Confirm the campground's exact site and operator directions.
- Copy the evidence URL and checked time into the workbook.
Do not let the passenger-car map become the boss simply because it loads first.
Lay Out Anchor Stops and Realistic Drive Days
How far should you drive each day on an RV road trip? Set a personal moving-time limit, then add fuel, meals, rest stops, traffic, setup, and weather buffers. There is no universal daily-mile number that works for every trailer, driver, road, or season.
Reserve anchor nights first. Then build the travel days around them rather than booking a chain of convenient pins and hoping the dates line up.
| Leg | Origin and destination | RV-safe miles | Tool moving time | Planned wheel-roll time | Break plan | Latest arrival | Primary overnight | Backup |
|---|---|---|---|---|---|---|---|---|
| 1 | __________ | __________ | __________ | __________ | __________ | __________ | __________ | __________ |
| 2 | __________ | __________ | __________ | __________ | __________ | __________ | __________ | __________ |
| 3 | __________ | __________ | __________ | __________ | __________ | __________ | __________ | __________ |
The moving time shown by a tool is not the day length. Add the time you need to pull into a fuel station, eat without rushing, walk a dog, stretch, deal with construction, and arrive with enough daylight to level and connect. A late arrival can turn a good campground into a locked gate and a dark backing exercise.
For each leg, record the selected route tool, the route warning, the official verification URL, and the checked time. If a leg exceeds your editable drive-time or usable-fuel setting, the workbook should flag it. Let the warning start a conversation with the plan instead of becoming a red light you ignore.
Audit Every Route Leg for RV-Specific Restrictions
How do you know if a route is RV safe? You do not know from one green line. You build confidence by checking the rig, the tool, the current source, and the last mile in sequence.
- Enter the actual rig profile. Use maximum travel height, travel width, connected length, and the relevant weight field. Confirm propane and any route-specific constraints.
- Read the route-tool warnings. Save the warning text and location. A warning is a lead to verify, not a fact to copy blindly.
- Open the current official road-owner source. Use the state DOT or 511 page, NPS or forest page, county notice, emergency alert, or other managing agency for the relevant segment.
- Inspect the final approach. Check turn geometry, bridge and tunnel signs, grade, narrow roads, campground entrance, and the direction you will arrive from.
- Ask the operator when the evidence is unclear. Get the name of the person or office, the answer, and the date. Ask about the exact site, not just the property.
- Log the evidence. Record the URL, the relevant wording, checked time, change risk, and next recheck in the workbook.
Stop and verify: Low clearance, bridge weight limit, propane restrictions, steep grade, road closure, temporary construction, wildfire, flood, snow, wind, and last-mile access all deserve a current source. If the source and the tool disagree, stop and resolve the disagreement before moving.
Use a same-day recheck for temporary restrictions and a morning recheck for closures, fire, flooding, snow, wind, and operator changes. State or local 511 pages, land-manager notices, emergency alerts, and the campground's own directions have different coverage. Link the source that controls the claim.
A tool can be out of date. An official page can describe a road outside the tool's coverage. A missing warning is not proof of suitability, and a current warning is not always self-explanatory. The job is to reconcile the evidence and leave a note another traveler can understand.
Plan RV Fuel Stops and Resupply Before the Gauge Makes the Decision
Fuel stops are a planning problem, not a last-minute search for a recognizable logo. Use conservative observed MPG, not a brochure number. Keep the reserve factor editable because it is a personal planning choice, not a universal safety rule.
Fuel formulas
- Usable planning range = tank capacity x planning MPG x chosen reserve factor
- Estimated gallons = RV-safe route miles / planning MPG
- Estimated fuel cost = estimated gallons x selected fuel price
For example, if your worksheet contains a 60-gallon tank, 9 MPG planning estimate, and a 0.65 reserve factor, the editable usable planning range is 351 miles. That is a planning input, not a guarantee. Headwinds, grades, detours, idling, generator use, traffic, and limited diesel availability can justify a larger buffer.
| Fuel record | Fill it with |
|---|---|
| Station | Name and address or mile marker |
| Direction | Which side of the road and which way you will approach |
| Fit evidence | Large-rig confidence source, photo, operator note, or unknown |
| Fuel | Gasoline, diesel, or other required type |
| Arrival target | Planned fuel level or remaining range |
| Alternate | Another station and its access note |
| Services | Food, restroom, propane, water, dump station, or none |
| Checked | Date and time of the last verification |
Do not promise that an app listing guarantees pump access, current inventory, a turning radius, or an open restroom. If the route is remote, choose the last fuel stop you can safely reach rather than the one that makes the spreadsheet look efficient.
Use an RV Campground Planner to Match Campgrounds, the Route, and Arrival Time
An RV campground planner should answer more than "is there a vacancy?" It should tell you whether the exact site, approach, utilities, arrival time, and backup all work together.
| Campground check | Record |
|---|---|
| Exact site type | Back-in, pull-through, patio, dry, full hookup, or other published category |
| Length definition | RV body, site length, or connected RV-plus-vehicle length |
| Fit | Connected rig, tow or towed vehicle parking, slide and awning clearance |
| Access | Travel height, tree cover, turn geometry, grade, gate, and final approach |
| Utilities | Amp service, water, sewer, dump access, generator rules |
| Arrival | Check-in time, late-arrival procedure, office and gate contact |
| Booking terms | Confirmation, cancellation deadline, fees, and source date |
| Backup | Alternate campground, route implication, and reservation consequence |
Use the operator or official reservation system for facts. Never infer that a campground-wide maximum applies to every site. If the listing says "up to 40 feet," ask whether that means the RV body, the connected setup, or a particular site category.
When a listing is vague, call and ask:
- Does the published length include my tow or towed vehicle?
- Is the specific site wide enough for slides, steps, awning, and a rear rack?
- Can I arrive after the office closes, and where do I check in?
- Does the final approach include a bridge, gate, grade, or turn I should know about?
- What are the current hookup, generator, pet, dump, and cancellation rules?
Log the answer and the checked date. Avoid generic claims about booking lead time, release windows, seasonal dates, fees, or cancellation policies unless the current operator page supports them.
For a Yellowstone trip, use the RV parks near Yellowstone National Park guide as a planning companion, then verify the current park and operator pages before reserving. The same habit applies to RV camping near Zion National Park and any popular gateway town.
Build a Trip Budget That Changes When the Route Changes
An RV trip budget should move when the route moves. A longer RV-safe route can add fuel, a night, a toll, or a campground change. Put those consequences in the same record as the route decision.
Trip total = fixed bookings + variable route costs + contingency
| Category | Planned | Booked | Actual | Variance | Refundable | Due date | Source |
|---|---|---|---|---|---|---|---|
| Fuel | |||||||
| Campgrounds | |||||||
| Tolls and parking | |||||||
| Propane, dump, and water | |||||||
| Food and groceries | |||||||
| Activities | |||||||
| Maintenance allowance | |||||||
| Contingency |
The workbook calculates estimated fuel cost from miles, planning MPG, and your price input. It does not publish a national daily average, because your rig, route, and travel style matter more than a neat headline number.
Check Roads, Weather, and Plan B Before Each Travel Day
Do the same three checks every time. A plan feels dependable when the check has a place in the calendar.
Booking week
- Confirm seasonal access and known construction.
- Check the campground's current directions, site category, and cancellation terms.
- Identify a backup route and backup campground.
- Save the official source URLs in the workbook.
Evening before
- Recheck road conditions and any road closure.
- Update the weather forecast for the route, not only the destination.
- Confirm fuel, propane, dump, grocery, and campground status.
- Move the Plan B trigger if the decision window has changed.
Departure morning
- Look for closures, warnings, wind, flooding, fire, snow, and operator changes.
- Confirm the first fuel stop and an alternate.
- Tell everyone the latest acceptable arrival and who decides to stop.
- Save an offline copy of the route, reservation, phone numbers, and evidence notes.
Set the decision threshold before the pressure arrives. It might be a delay, a shorter leg, a different overnight, or staying put. Do not invent wind, snow, heat, or flood thresholds without a qualified source tied to the actual rig and driver.
For coastal or storm-sensitive trips, the beach RV camping guide for Florida and the Gulf Coast is a useful example of why the weather check belongs in the route plan, not in a last-minute text thread.
Download the Seven-Tab RV Road Trip Planner Worksheet
The downloadable RV road trip planner worksheet is the reusable part of this guide. The printable PDF is for a clipboard, a glovebox, or the campground office desk when the signal gives up.

The workbook has seven functional planning tabs plus a dashboard. It uses editable input cells, formula cells that are visually distinct, filters, frozen headers, a visible Last checked column, and a small dashboard. It does not claim to receive live traffic or weather. Open it in Microsoft Excel or a compatible spreadsheet app, then check the formulas against your own trip.
Tab 1 - Rig and Trip Profile
Start with fields for rig type, travel height, travel width, connected length, relevant loaded or rated weight, propane, fuel type, tank capacity, planning MPG, reserve factor, preferred drive time, latest arrival, dates, travelers, pets, accessibility, hookup needs, emergency contact, and roadside-assistance details.
The source field is as important as the number. Record measured, door label, owner manual, scale ticket, or another reliable origin. If you do not know the source, leave the uncertainty visible instead of turning it into a confident number.
Tabs 2 and 3 - Route Legs and Stop Plan
The Route Legs tab records leg number, origin, destination, date, RV-safe miles, moving time, buffer, departure, target arrival, selected route tool, warning, official verification URL, evidence note, checked time, and backup route.
The Stop Plan tab records stop type, name, mile marker or address, planned arrival, access note, dwell time, current hours, phone, source URL, alternate, and last checked. The planned-arrival formula uses your departure and duration inputs. It does not imply that live traffic, weather, or a delayed fuel stop has been included.
Tabs 4 and 5 - Fuel and Campgrounds
Fuel fields include leg miles, planning MPG, tank capacity, reserve factor, usable range, estimated gallons, price input, estimated cost, primary fuel stop, alternate, access note, and check date. The sheet flags a planned leg that exceeds the editable usable range.
Campgrounds fields include date, property, booking URL, confirmation, exact site type, site-length definition, connected-rig fit, hookups, tow parking, check-in, cancellation deadline, final approach note, primary contact, backup, and last checked.
Formula cells use the equations in the fuel and budget sections. A blank critical field stays blank and visible. The workbook should not quietly turn missing fit evidence into "yes."
Tabs 6 and 7 - Budget, Verification Log, Plan B, and Dashboard
Tab 6 keeps separate Budget and Verification Log tables. Budget columns are category, planned, booked, actual, variance, refundable, due date, and source. Verification columns are claim, URL, final status, evidence found, checked time, change risk, and recheck time.
Tab 7 keeps Plan B fields for trigger, decision deadline, alternate route, alternate overnight, fuel implication, reservation implication, person responsible, and status. The dashboard shows total route miles, total planned moving time, fuel estimate, booked nights, open verification items, upcoming cancellation deadlines, and unresolved Plan B triggers.
Use the filled example row as a demonstration, then replace it with your own data. The blank copy is meant to remain blank. A worksheet earns its keep when it shows what you still need to check.
RV Route Planner Comparison: Denver to West Yellowstone Public Preview
This route test is deliberately transparent about what a public preview can and cannot prove. The demonstration profile is:
| Input | Demonstration value | Status |
|---|---|---|
| Trip | Denver, Colorado to West Yellowstone, Montana | Fixed endpoint pair |
| Rig | 32-foot travel trailer | Fictional test input, not a recommendation |
| Travel height | 13 feet 2 inches | Fictional test input |
| Travel width | 8 feet 6 inches | Fictional test input |
| Combined planning weight | 15,000 pounds | Fictional test input |
| Propane | Carried | Fictional test input |
| Planning estimate | 9 MPG | Fictional test input |
Observed preview record: August 16, 2026, Asia/Shanghai. The public AdventureGenie trip planner accepted the endpoints and generated a preview with 4 stops, 654 total miles, 218 miles as the displayed daily average, and 10:09 estimated drive time. Its visible stop cards showed Denver, Elk Mountain, Wyoming, Pinedale, Wyoming, and West Yellowstone. The page exposed no stable app version or downloadable export in the logged-out view. That is a useful preview of how a tool structures a trip. It is not a verified RV-safe result for the fictional profile above, because the public flow requested an account before the vehicle-profile settings could be checked.
The public RV LIFE Trip Wizard page exposes a different capability signal. It says the service can customize RV-safe routes to the RV's height and weight, show campgrounds and gas stops, and let users set driving times or distances. Its public demo requested an email before showing the planning interface, so no email was submitted for this editorial test. We therefore do not publish an RV LIFE route output, warning, subscription state, or campground result that we did not independently see.
RV route planner comparison record
| Test question | AdventureGenie public preview | RV LIFE public page | Editorial decision |
|---|---|---|---|
| Endpoints accepted without a paid booking | Yes | Public feature page only | Keep the endpoints visible |
| Route output visible without sharing an email | Yes, preview route | No, demo asked for email | Report only the output actually seen |
| Fixed rig profile verified | No, profile settings gated | Capability described, not tested | Do not call either result RV-safe |
| Stops or campground fit verified | No | No | Check each operator directly |
| Official road-owner verification completed | Not by the preview itself | Not by the public page | Use the source ladder below |
The selected plan is therefore a verification workflow, not a claim that one app won. Enter the fixed profile in the tool you choose, compare the route and warnings, then check every critical segment against the current road-owner page. For a route that crosses Colorado, Wyoming, and Montana, start with COtrip, Wyoming road conditions, and Montana 511. If the selected route enters Idaho, add Idaho 511. For Yellowstone access, check the NPS park roads page. Use the proposed campground's operator page for the final approach and site fit.
| Critical segment or claim | Source of record | What to log |
|---|---|---|
| Colorado road status | COtrip or the managing road owner | Closure, construction, direction, checked time |
| Wyoming road status | Wyoming 511 or the managing road owner | Pass, wind, snow, bridge, or detour note |
| Montana approach | Montana 511 or the managing road owner | Current access and restriction wording |
| Yellowstone road or entrance | NPS road and conditions pages | Projected versus current status |
| Overnight fit | Campground operator or official reservation page | Exact site category, length definition, approach, contact |
The rejected alternative should be a real, verified rejection, not a made-up warning. In your workbook, mark a route or stop as rejected only when the source shows a closure, the setup exceeds a published limit, the operator cannot confirm fit, or the day exceeds your own drive-time or fuel setting. If both tools return the same route, say so. Agreement is not a problem to hide.
Add an Access and Security Check to the Departure Plan
Security is one layer of trip readiness. A lock does not protect an open window, an exterior compartment, or a visible laptop.
Before leaving the campground:
- Lock the entry door, windows, and exterior compartments.
- Move visible valuables out of sight and secure loose gear.
- Decide who has a code, key, or fob, and how shared access changes when travelers return separately.
- Carry a backup entry plan without leaving a key under the mat.
- Check battery status and keep the mechanical backup where the group can reach it.
- Write down what happens if one traveler returns early, loses a phone, or cannot reach the primary contact.
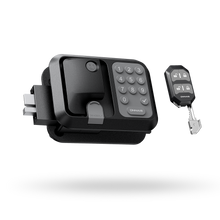
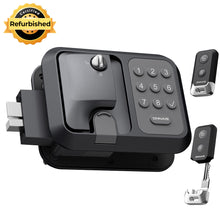
For a compatible right-hinged RV entry door, the ONNAIS Guard Smart RV Keyless Entry Door Lock is one optional way to manage shared access. It supports Bluetooth app access, keypad password entry, a remote key fob, and a mechanical key. The app can check battery level, manage fobs, show operation history, create one-time passwords, and share access with registered users. The lock has an internal deadbolt, an emergency temporary-power port, a weather-resistant exterior, and uses four AA batteries, which are not included.
Measure before buying. The required cutout is 3.75 inches high by 2.75 inches wide, the door opening distance from the latch is 1.5 inches, and the door thickness is 1.25 to 1.5 inches. The current product information excludes Class A RVs, Class C two-pin door types, and left-hinged doors. It is not a universal fit, it is not theft-proof, and Bluetooth app control is not the same as remote internet access. Keep the mechanical key, test the batteries, and use the lock as one part of the departure plan.
If you are unsure about fit, check whether an RV door lock will fit before ordering. The product page and your measured door are the source of truth.
The broader RV door locks guide explains the difference between keyed, keypad, and app-connected entry hardware. Use it for the hardware decision; use this planner for the trip decision.
Common RV Road Trip Planning Mistakes
These are the mistakes that turn a reasonable itinerary into a long day with no good exit.
- Entering guessed rig dimensions. Measure the travel height, width, connected length, and relevant weight field.
- Accepting a passenger-car route. Use it for inspection and traffic context, not as proof of an RV-safe route.
- Planning by miles without moving-time buffers. Add fuel, meals, rest stops, traffic, setup, and weather.
- Assuming a listed fuel station fits the rig. Check access direction, turning room, fuel type, and an alternate.
- Booking a campground without checking the exact site and approach. Confirm site length definition, slides, hookups, gate, and final turns.
- Carrying no source-dated Plan B. Record a trigger, deadline, alternate route, alternate campground, and reservation consequence.
RV Road Trip Planner FAQs
What is the best RV road trip planner?
The best planner is the one that accepts your actual rig profile and fits your workflow. Use an RV-aware route engine for the first route, official sources for current restrictions, the campground operator for site fit, and a workbook for decisions and backups. No single app replaces those checks.
Is there a free RV trip planner?
Some RV trip planners offer public pages, previews, trials, or limited free features, but the details change. Check the current plan page before relying on a feature. A free general map can help inspect a route, but it may not model RV height, weight, length, propane, or grade limits.
Can I use Google Maps to route an RV?
You can use Google Maps to inspect traffic, terrain, turns, and the last mile, but do not treat it as an RV GPS by default. It may not know your complete height, weight, connected length, propane restrictions, or driver comfort. Verify the route with an RV-aware tool and the road owner.
How far should I drive an RV in one day?
Set a daily moving-time limit that leaves room for fuel, breaks, traffic, weather, and campground setup. A shorter day can be the right answer for a new driver, a large trailer, a mountain route, or a late arrival. Plan around daylight and stamina, not a universal mile target.
Should I book every campground in advance?
Book the anchor nights and the least flexible locations first, then decide where flexibility is more valuable than certainty. Check the operator's current reservation, cancellation, and arrival rules. Keep a backup campground when a remote leg, weather-sensitive road, event, or hard arrival time makes improvising risky.
Save the Plan, Then Verify the Next Leg
Use the measured rig, save the route, verify the current official sources, keep a backup, and repeat the check before each travel day. Download the RV road trip planner worksheet, then let the next RV-safe route earn your confidence.