RV Screen Door Latch Replacement: Types, Fit & Installation
Replace an RV screen door latch confidently. Identify types, measure handing and fit, install the assembly, align the keeper, and test the door.

An RV screen door latch is a small part with an outsized talent for causing trouble. It cracks, loosens, misses the keeper, or binds after a few seasons of travel. Before you order a replacement, measure the old assembly and confirm the handing, hole pattern, footprint, thickness, clearance, and keeper geometry. A similar-looking latch is not proof of fit.
This guide covers the lightweight latch that holds the screen panel closed. It does not replace the main RV entry-door lock or its deadbolt.
Name the parts you are looking at
Take a straight-on photo before removing anything. Label the parts so you and the parts counter are talking about the same piece.
| Part | What it does |
|---|---|
| Interior actuator, paddle, or lever | Moves the latch mechanism from inside the screen door |
| Latch body | Holds the spring, bolt, and mounting points |
| Bezel | Covers the opening around the handle or actuator |
| Mounting screws | Hold the latch assembly to the screen-door frame |
| Keeper or catch | Receives the latch when the door closes |
| Strike plate | Provides the contact surface or opening for the latch |
| Screen-door frame | Lightweight panel that can crack or deform if over-tightened |
| Main entry door lock | A separate exterior-entry assembly with its own fit requirements |
Terminology varies by manufacturer. Dexter's RV screen-door latch replacement guide, for example, refers to a right-hand or left-hand latch assembly, a keeper, a strike plate, and a bezel. Use the exact terms in the instructions for the part you are buying.
Repair, adjust, or replace?
Do not reach for a new part until you know what failed.
| Symptom | Likely cause | First check | Next action |
|---|---|---|---|
| Screws turn but never tighten | Stripped lightweight frame or wrong fastener | Inspect the holes and old screw threads | Use only a manufacturer-approved repair or replacement plan |
| Latch misses by a few millimeters | Keeper moved or door sagged | Close the door gently and watch the contact point | Adjust the keeper if the frame is sound |
| Door will not close without force | Binding, bent actuator, or frame movement | Check for rubbing, debris, and a shifted bezel | Stop forcing it. Repair the cause or replace the assembly |
| Plastic housing is cracked | Age, UV, impact, or overtightening | Look for cracks around screw holes | Replace the damaged assembly |
| Latch does not spring back | Worn or broken spring | Move the actuator gently with the door open | Replace the assembly unless the manual lists a service part |
| Door sits low or twisted | Hinge or frame sag | Check the gap around the frame | Address the sag before adjusting the keeper |
| New latch appears to fit but will not catch | Wrong hand, footprint, or keeper geometry | Compare measurements and product drawing | Do not enlarge holes until fit is confirmed |
Pause the DIY job when the frame is cracked, wiring is in the proposed drilling area, the door will not close without force, or the manufacturer calls for service. A screen door is light. That does not make its frame indestructible.
Measure the existing latch before you order
A ruler and a phone camera save more time than a second shipping charge. Use inches or millimeters consistently and write the unit beside every measurement.
Six-photo measurement worksheet
- Interior, straight on: show the actuator, bezel, and screw pattern.
- Exterior, straight on: show the latch body and its relationship to the frame.
- Door edge: show thickness and any lip or trim that limits clearance.
- Keeper and strike: show the closed-door contact point.
- Screw pattern with a ruler: measure center-to-center spacing, not outside edge to outside edge.
- Closed-door clearance: show the gap between latch, frame, screen mesh, and main entry door.
Remove license plates, keys, access codes, campsite names, and personal details from the photos.
| Measurement | Your reading |
|---|---|
| RV year, make, and model | |
| Door manufacturer or current part number | |
| Viewing position used to identify handing | |
| Left-hand or right-hand label from the selected manufacturer | |
| Latch footprint, width x height | |
| Center-to-center screw-hole spacing | |
| Number and size of fasteners | |
| Door or frame thickness | |
| Edge distance or backset, if specified | |
| Trim and mesh clearance | |
| Keeper width, height, projection, and offset | |
| Strike-plate shape and dimensions | |
| Bezel dimensions |
Do not infer scale from a product photo. Compare your worksheet with the exact current manufacturer drawing or manual. If a dimension is not published, write "not specified" rather than guessing.
For the wider fit logic used on main RV locks, see our RV door lock sizes and fit guide. The screen-door latch still needs its own measurements.
Left-hand vs right-hand: define the viewpoint
Handing labels are a common source of wrong orders. Different sellers can describe the same assembly from different viewing positions.
Write the viewpoint at the top of your worksheet. For example: "Viewed from inside the RV, facing the screen door." Then compare the actuator direction, latch bolt, keeper side, and manufacturer photos from that same viewpoint. Do not assume that "left" on one listing means "left" on every listing.
If the selected manufacturer publishes right- and left-hand part numbers, use those exact numbers. Dexter's current guide lists a Dexter Right Hand Upgraded Latch Assembly, 990003-01, and a Dexter Left Hand Upgraded Latch Assembly, 990003-02. That is Dexter-specific part information, not a universal RV standard.
Compare parts without the word universal
Use a fit-confidence column. It forces the evidence into the open.
| Fit confidence | Evidence required |
|---|---|
| Green | Exact part number or manufacturer cross-reference, matching hand, footprint, hole spacing, thickness, clearance, and keeper geometry are documented |
| Amber | Several dimensions match, but one non-critical detail is not specified. Confirm with the manufacturer before ordering |
| Red | Listing says "universal," relies on a photo, has no usable drawing, or conflicts on handing, holes, thickness, or keeper position |
A product comparison should include:
- Manufacturer and exact SKU.
- Handing and the stated viewing position.
- Footprint and screw-hole spacing.
- Door or frame thickness range.
- Keeper and strike included or not included.
- Bezel included or not included.
- Material and tool requirements.
- Manual or drawing date.
- Any dimension listed as "not specified."
A matching three-screw pattern is helpful. It is not enough by itself. Lippert's current replacement support page identifies a current screen-door-latch replacement procedure, while Dexter's sequence is specific to its own assembly. Treat each product page on its own evidence.
Tools and preparation
Typical tools are a #2 Phillips screwdriver when the selected instructions call for it, a tape measure or caliper, painter's tape, a pencil, a phone camera, and a small container for screws. Dexter's current guide specifically lists a #2 Phillips screwdriver for its assembly. Do not assume every latch uses the same tool or fastener.
Support the screen door so it does not hang on the latch while you work. Protect the mesh and finish with tape or a cloth. Photograph the old orientation. Keep the old latch until the replacement has passed every test.
RV screen door latch replacement, step by step
These steps describe a careful replacement sequence. The exact order and fastener type in the current manual take priority.
- Confirm the part. Recheck hand, footprint, holes, thickness, keeper, and included hardware against your worksheet.
- Open and support the screen door. Keep the panel from swinging or twisting while the latch is loose.
- Mark the existing positions. Use painter's tape to mark the latch and keeper edges. Photos are your backup.
- Remove the old latch slowly. Hold the assembly while removing each screw. Dexter's guide removes three latch screws, then slides the latch away from the door.
- Inspect the surface. Check for cracks, crushed mesh, stripped holes, bent trim, and frame movement.
- Dry-fit every part. Place the latch, keeper, strike, and bezel without tightening. Confirm the actuator moves freely and the door closes without force.
- Start fasteners by hand. This keeps a screw from entering at an angle and stripping a lightweight frame.
- Tighten evenly. Follow the selected manufacturer's torque or tightening guidance. Snug is not the same as crushing plastic.
- Close the door gently. Watch where the latch meets the keeper. Do not slam the panel to make a poor fit appear acceptable.
- Adjust the keeper in small steps. If the latch misses, loosen the keeper slightly, move it only as needed, and retighten before testing again.
- Install the strike or bezel if included. Use the current instructions and the supplied or approved fasteners.
- Test repeatedly. Open and close the screen door several times from both sides. Check the main entry door separately.
Step 4 is where most folks strip the mounting screws. Slow down, keep the screwdriver square, and let the parts do the talking.
Align the keeper and test the door
Make one adjustment at a time. A latch that catches only when you lift or slam the door is not finished.
| Symptom after installation | Adjustment or next check |
|---|---|
| Latch contacts above the keeper | Check door sag, then lower the keeper only if the frame is sound |
| Latch contacts below the keeper | Check hinge and frame alignment, then raise the keeper carefully |
| Bolt reaches but will not enter | Check projection, offset, and strike opening |
| Actuator rubs the bezel | Recheck footprint and bezel clearance; do not force the handle |
| Door rattles after closing | Confirm the latch is fully engaged and fasteners are seated |
| Screws loosen after travel | Inspect holes and fastener type; use the manual's approved remedy |
| Screen mesh or trim rubs | Stop and correct clearance before repeated use |
Acceptance test:
- The latch catches without slamming.
- The actuator releases consistently.
- The panel does not rattle when closed.
- The screen mesh and trim remain clear.
- Screws stay seated after repeated cycles.
- The main entry door closes and locks independently.
- Emergency egress is not blocked.
Persistent sag, frame deformation, or a latch that binds after correct adjustment belongs with a qualified RV service technician.
Screen-door latch vs main entry lock
| Screen-door latch | Main entry lock |
|---|---|
| Holds the screen panel closed for ventilation and daily use | Controls exterior entry and may include a deadbolt |
| Lightweight latch, keeper, strike, and bezel | Main cutout, latch geometry, handing, strike, and fit system |
| Usually a small mechanical replacement | May be a mechanical or keyless lock upgrade |
| Does not provide the main door's entry security | Does not repair a separate screen-panel latch |
For a main entry issue, use our how to replace an RV door lock guide, troubleshooting guide for common RV lock problems, or signs your RV door lock needs replacement. The RV door locks guide explains the wider entry-lock system.
When an ONNAIS entry lock is the relevant fix
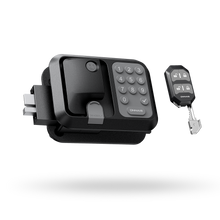
If the failing part is the main RV entry lock, ONNAIS Guard Smart gives you app access over Bluetooth, a keypad password, a remote key fob, and a mechanical key. It includes an internal deadbolt, a temporary emergency-power port, and a weather-resistant exterior. It uses four AA 1.5V batteries, not included.

Guard Smart is not a screen-door-latch replacement. Fit requires a 3.75 x 2.75-inch cutout, a 1.25 to 1.5-inch door, a 1.5-inch latch distance, compatible right-hinged geometry, and the correct RV door construction. The product information excludes Class A, Class C two-pin, and left-hinged doors. Read the ONNAIS Guard Smart RV Keyless Entry Door Lock details only after confirming that you are solving a main-entry problem. We do not call it universal, theft-proof, GPS-enabled, or fully waterproof.
FAQs
Are RV screen-door latches universal?
No. Some assemblies share a screw pattern, but hand, footprint, thickness, clearance, keeper geometry, and included parts can differ. Measure the old latch and compare the exact manufacturer drawing before ordering.
Can I replace only the keeper?
Sometimes, if the latch body and frame are sound and the manufacturer supplies a matching keeper. Confirm projection, offset, strike shape, and fastener pattern. A new keeper cannot correct a cracked latch body or sagging frame.
Why does my new latch not catch?
Check handing, door sag, keeper height, projection, strike opening, and bezel clearance. Loosen and move the keeper in small steps only after confirming the replacement assembly matches the original measurements.
Can a main RV door lock replace a screen-door latch?
No. They are different assemblies with different jobs and fit requirements. A main entry lock may solve an exterior-door problem, but it will not replace the small latch that holds a screen panel closed.
Measure twice, dry-fit once
A successful RV screen door latch replacement is less about force than fit. Photograph the old assembly, write down the dimensions and viewpoint, confirm the exact part number, dry-fit before tightening, and test the keeper gently. Keep the main entry lock problem in its own lane.