How to Replace an RV Door Lock: Step-by-Step RV Entry Lock Replacement Guide

Quick answer: Replacing an RV door lock usually means removing the old interior and exterior lock assemblies, checking the door opening, dry-fitting the new lock, tightening the hardware evenly, aligning the strike plate, programming a keyless lock if applicable, and testing the latch, deadbolt, key, and keypad before travel.
RV door lock replacement is the process of removing an existing RV entry door lock and installing a compatible replacement lock that matches the door opening, latch position, door thickness, hinge direction, and clearance around the entry door.
Worn latches, broken keys, or an upgrade to keyless entry can justify replacing the lock.
This guide explains how to replace an RV door lock on the main RV coach entry door—not cab doors, van sliding doors, ramp doors, baggage doors, or compartment locks.
For broader context around lock types and common RV lock issues, see the complete RV door lock guide.
Quick Answer: Can You Replace an RV Door Lock Yourself?
Often, yes—many towable RV entry locks can be replaced by a careful DIY owner as long as the replacement lock matches the existing door and hardware “family.” In practice, the door opening and latch layout control fit more than your RV brand name.
That said, some door/lock setups are not simple swap-outs. Class A motorhomes with integrated entry assemblies, Class C two-pin systems, Class B automotive-style doors, glass or integrated-window doors, left-hinged doors, and modified/enlarged openings may require model-specific hardware or professional help.
If you’re not sure where your rig fits, use the RV door lock compatibility by RV type article before ordering parts.
Before You Start: Confirm the Replacement Lock Actually Fits
RV door locks are not always interchangeable, even when they look similar. (Here’s a deeper explanation of whether RV door locks are universal.)
If you’re replacing a camper door lock on a towable-style entry door, fit is still the first hurdle.
Check the Door, Not Just the RV Brand
Your RV’s make/model/year is a starting clue—not a guarantee.
- Doors get replaced.
- Prior owners sometimes install different lock families.
- Openings can be enlarged or repaired.
- Trim, grab handles, and screen doors can change what fits.
Confirm the Basic Fit Points
Use this quick fit checklist before you remove the old lock:
| Fit point to confirm | What you’re checking |
|---|---|
| Door opening / cutout family | Same cutout family as the current lock |
| Door thickness | Matches door thickness so it clamps without binding |
| Latch + deadbolt position | Latch/bolt line up with door edge + frame pocket |
| Hinge direction | Many RV entry locks assume a specific hinge handing |
| Screen door clearance | Interior housing clears the screen door |
| Nearby clearance | No interference from trim, shade, grab handle |
| Lock family | Correct lock family for this door type |

For exact measuring steps and common size families, use the RV door lock size guide.
Warning: If a lock doesn’t sit flat during a dry-fit, don’t try to “make it work” by forcing, filing, drilling, or enlarging the opening. Stop and re-check compatibility.
Tools and Supplies You May Need
Keep it organized.
- Phillips screwdriver (hand screwdriver recommended for final tightening)
- Measuring tape or ruler
- Painter’s tape (to protect the door finish)
- Pencil for alignment marks
- Phone/camera (photos help a lot)
- Small container for screws
- Mild cleaner and a soft cloth
- Fresh batteries for keyless locks
- Installation guide for your specific lock
- Manufacturer-approved gasket/weather seal/sealant only if required by the lock maker
Pro Tip: Final tightening by hand helps you avoid stripped screws and uneven compression that can make the latch bind.
Take Photos Before Removing the Old RV Lock
If the new lock doesn’t fit—or if you need support—photos make it much easier to confirm what door and lock family you have.
Photo checklist:
- Full exterior entry door
- Exterior lock plate
- Interior lock plate
- Door edge showing latch and deadbolt
- Strike plate and frame pocket
- Hinges from outside
- Screen door clearance
- Nearby clearance: window trim/shade, grab handle
- Any cracks, water damage, non-original repairs, filler plates, or old sealant
- Battery compartment/wiring (keyless lock)

How to Replace an RV Door Lock: The Workflow at a Glance
A clean RV door lock replacement usually goes best in this order:
- Confirm the lock and door are compatible.
- Photograph and test the existing hardware.
- Remove the old lock and inspect the opening.
- Dry-fit and install the replacement without forcing it.
- Align the strike plate and complete open-door and closed-door tests.

The same core sequence applies whether you are installing a standard mechanical lock or upgrading to a keyless model.
Step 1: Open the Door and Test the Existing Lock
Before you remove anything, test the lock while it’s still installed. This helps you figure out whether the issue is the lock itself—or door/frame alignment.
Quick test:
- Door open: exterior + interior handle
- Door open: deadbolt in/out
- Door closed (gently): latch catches without slamming
- Door closed (gently): deadbolt turns without force
Here’s a simple diagnostic table:
| Symptom before removal | Likely area to inspect |
|---|---|
| Works when open but binds when closed | Strike plate or frame alignment |
| Binds when open and closed | Lock assembly, spindle, or internal mechanism |
| Key turns but deadbolt sticks | Deadbolt alignment or worn lock |
| Door must be lifted to latch | Sagging door, hinge issue, or frame issue |
If your lock works smoothly with the door open but not closed, you’ll likely spend most of your time on strike plate alignment later.
Step 2: Remove the Interior Lock Assembly
Keep the door open for the entire removal.
- Put painter’s tape around the lock area (optional, but protects the finish).
- Support the exterior handle with one hand so it doesn’t drop when screws come out.
- Remove the interior screws slowly.
- Pull the interior assembly away and set it aside.
Caution: If screws are stripped, rusted, or frozen, stop before you damage the door skin. Forcing a stuck screw can turn a simple RV door lock replacement into a door repair project.
Step 3: Remove the Exterior Handle and Edge Hardware
With the interior assembly removed:
- Pull the exterior assembly straight out (don’t pry on the door skin).
- Remove any separate edge plate if your lock uses one.
- Keep the old hardware until the new lock is tested.
Quick visual comparison:
- Do the latch and deadbolt locations match?
- Does the new exterior plate cover the old footprint?
- Do the screw holes line up without forcing?
Step 4: Clean and Inspect the Door Opening
Once the old lock is out, clean the opening so you can judge fit accurately.
Look for:
- Old gasket residue and debris
- Cracks, soft spots, swelling, or water damage
- Enlarged/uneven cutouts or prior repairs
- Separation along the door edge

Stop-warning: If the opening is damaged, soft, or severely enlarged, don’t force a new lock into place.
Step 5: Dry-Fit the New Lock Before Tightening
Dry-fitting is the “save yourself later” step. It helps you catch a mismatch before the lock is compressed onto the door.
Dry-fit checklist:
- Exterior assembly sits flat against the door
- Gasket/weather seal sits correctly (not folded)
- Latch and deadbolt align with the door edge opening
- Interior plate sits flat
- Thumb turn/spindle engages smoothly
- Screen door can close without hitting the interior housing
- Nearby trim/shade/grab handle don’t interfere
- Keyless wiring reaches the connector without being stretched or pinched

If anything doesn’t sit flat or move smoothly with minimal pressure, treat it as a fitment issue—not something to “muscle through.”
Step 6: Install the Exterior Assembly
If your lock is keyless, route any wiring gently so it can’t be pinched by the housing or screws.
- Seat the gasket/weather seal as specified.
- Insert the exterior assembly squarely.
- Keep the keypad/handle level.
- Route keyless wiring gently (don’t pinch it).
- Don’t fully tighten yet.
The goal is to seat the outside half without compressing the assembly crooked.
Step 7: Attach the Interior Assembly
This is where many new locks start binding—usually from uneven tightening.
- Align the thumb turn/spindle/actuator so it engages smoothly.
- Seat the interior plate flat.
- Start all screws by hand.
- Tighten evenly in an alternating pattern (like lug nuts on a wheel): a little on one screw, then the opposite.
- After each round of tightening, test the handle and deadbolt with the door still open.

Troubleshooting insight: If the lock binds only after tightening, slightly loosen the screws and retest. An RV entry door lock replacement often fails because the assembly is compressed unevenly.
Step 8: Install Batteries and Program the Keyless Lock (If Applicable)
This section applies only if you’re doing an RV keyless door lock installation.
Set the Keypad Code
- Install fresh batteries.
- Follow the model-specific manual.
- Change any default code immediately.
- Test the keypad while the door is open.
Pair Remote Fobs or App Controls (If Included)
- Pair accessories after the mechanical lock works correctly.
- Don’t troubleshoot the remote/app until the latch and deadbolt move smoothly.
Main point: mechanical fit comes before electronic convenience.
Step 9: Align the Strike Plate and Frame Pocket
After replacing an RV entry door lock, the new assembly can work perfectly with the door open and still fail to latch smoothly because the frame side is slightly out of alignment.
(That’s a common theme in RV latch troubleshooting guides like The RV Geeks’ article on RV door latch repair and alignment checks.)
Practical alignment approach:
- Close the door slowly (don’t slam it).
- Watch where the latch hits.
- Test latch first, then deadbolt.
- If you must lift/push hard, suspect door/frame alignment.
Strike plate troubleshooting table:
| Problem | Possible cause | What to check |
|---|---|---|
| Latch hits the strike edge | Strike plate misalignment | Strike plate position and screw tightness |
| Deadbolt rubs | Frame pocket is tight or misaligned | Deadbolt pocket alignment |
| Door only locks when pushed hard | Seal pressure or frame alignment | Door fit + seal compression |
| Works open but not closed | Frame-side issue | Strike plate + frame pocket |

Warning: If you’re tempted to force the latch or deadbolt, stop and diagnose alignment first. Forcing is how handles bend, screws strip, and doors get damaged.
Step 10: Run the Final Safety and Function Test
Before the first closed-door test, keep the new mechanical backup key in your pocket or somewhere accessible outside the RV so you cannot accidentally lock yourself out. Then use this checklist before you call the job done—and again before your next drive.
Final test checklist:
- Door open: exterior handle works
- Door open: interior handle works
- Door open: latch moves smoothly
- Door open: deadbolt extends and retracts smoothly
- Door closed: latch catches without slamming
- Door closed: deadbolt locks without force
- Interior release works every time
- Exterior key works (if present)
- Keypad works (if present)
- Remote fob/app works (if present)
- Screen door clears the interior assembly
- Screws are snug but not over-tightened
- Gasket or weather seal sits flat without gaps or folds
- Door can always be opened from inside

Retest after the first drive. Road vibration can reveal a screw that needs a gentle re-snug or a strike plate that shifted.
Standard RV Lock vs Keyless RV Lock Replacement: What Changes?
A keyless lock still has to fit mechanically first.
| Step | Standard RV lock | Keyless RV lock |
|---|---|---|
| Mechanical fit | Required | Required |
| Batteries | Not needed | Required |
| Code setup | Not needed | Required |
| Remote/app pairing | Not applicable | Model-specific |
| Manual key backup | Usually yes | Usually yes |
| Troubleshooting order | Mechanical only | Mechanical first, electronic second |
Troubleshooting After Replacing an RV Door Lock
Many complaints after an install are really strike-plate or door-fit issues—not a bad lock. Treat troubleshooting like RV door latch replacement diagnostics: confirm smooth mechanical movement first, then confirm frame alignment.
The New RV Door Lock Will Not Sit Flat
Common causes:
- Wrong lock family for your door
- Folded gasket/weather seal
- Pinched wiring (keyless)
- Uneven surface or enlarged opening
Next check: remove the lock, clean the area again, and dry-fit. If it still won’t sit flat, stop and confirm measurements/compatibility.

The Handle Works When the Door Is Open but Not Closed
Common causes:
- Strike plate misalignment
- Door sag (hinges loosening over time)
- Frame pressure or seal compression
Next check: adjust alignment on the frame side first.
The Deadbolt Will Not Extend Fully
Common causes:
- Frame pocket blocked or misaligned
- Lock body slightly rotated
- Screws over-tightened
- Door not fully seated against the seal
Next check: loosen screws slightly, re-test with the door open, then re-test closed.
The Keypad Lights Up but the Lock Does Not Move
Common causes:
- Mechanical binding (lock can’t throw the bolt)
- Weak batteries
- Programming not completed
Next check: confirm the deadbolt moves easily by hand with the door open before you troubleshoot electronics.
The Screen Door Hits the Interior Lock
Common causes:
- Interior housing is too deep
- Screen door clearance is tight
- Window shade or trim conflicts with the lock
Next check: confirm the replacement lock is designed for your door’s clearance limits before proceeding.
When You Should Not Replace the RV Door Lock Yourself
Stop and get model-specific help if any of these apply:
- Class A motorhome integrated entry assembly
- Class C two-pin lock system
- Class B automotive door
- Van sliding or cab door
- Glass or integrated-window door without model-specific confirmation
- Left-hinged door if the replacement lock does not support it
- Enlarged, cracked, or water-damaged opening
- Automotive linkage-style mechanisms
- Door/frame damage that prevents smooth latching
- Any install that requires structural modification to fit
If you need a compatibility refresher, use the RV door lock compatibility by RV type guide.
How Long Does RV Door Lock Replacement Take?
Realistic ranges (no promises):
- Simple same-family replacement: often 20–45 minutes
- First-time keyless replacement: often 45–90 minutes (includes programming + testing)
- Door damage, old sealant, unclear fit, or frame issues can take longer
Should You Replace, Rekey, or Order Replacement Keys?
Keep this decision simple:
| Situation | Better option |
|---|---|
| Lost one spare key but the lock works | Replacement key |
| Want one key for several locks | Rekeying may help |
| Lock is worn, loose, or unreliable | Replace the lock |
| Want keypad, fob, or app access | Upgrade to keyless |
| Lock family is unclear | Verify compatibility first |
If the lock is loose, binds, won’t latch reliably, or no longer matches your access needs, replacement is usually the safer long-term move.
FAQ
Can I replace an RV door lock myself?
Yes, many RV owners can replace a same-family RV entry door lock if the new lock matches the door opening, thickness, latch position, hinge direction, and clearance.
How do I know if my replacement RV lock fits?
Check the door opening, door thickness, latch and deadbolt position, hinge direction, screen clearance, and nearby trim before installation. For detailed measuring steps, use the RV door lock size guide.
Do I need to drill new holes to replace an RV door lock?
A compatible same-family replacement usually should not require major door modification. Do not drill, file, or enlarge the opening as a routine installation step. If the replacement does not fit the existing opening, stop and verify the lock family and dimensions before changing the door.
Why does my new RV lock work when the door is open but not closed?
The lock may be mechanically fine, but the strike plate or frame pocket may be misaligned. Test the latch and deadbolt slowly with the door open and then closed.
Can I replace a standard RV lock with a keyless lock?
Yes—if the keyless lock matches the same door and lock family. Mechanical fit must be confirmed before programming the keypad, remote fob, or app.
How long does it take to replace an RV door lock?
A straightforward same-family replacement may take 20–45 minutes, while a first-time keyless installation with programming and testing may take 45–90 minutes.
Should I keep the old RV door lock after replacing it?
Yes. Keep the old lock, keys, screws, and related hardware until the replacement has passed every open-door and closed-door test and has remained secure after the first drive.
What should I do if the deadbolt does not line up with the strike plate?
Don’t force the deadbolt. Recheck lock alignment, screw tightness, door position, strike plate location, and frame pocket alignment. If alignment is beyond small adjustments, get RV service help.
Conclusion: Replace the Lock, Then Test the Door
A reliable RV entry door lock replacement is about sequence, alignment, and safe operation. The finished lock should latch smoothly, lock without force, and always release from inside.
- Confirm fit before removal.
- Remove the old lock carefully.
- Clean and inspect the opening.
- Dry-fit before final tightening.
- Test the lock with the door open first, then closed.
- Align the strike plate before blaming the keypad or electronics.
- Retest before travel—and after the first drive.
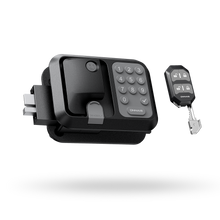
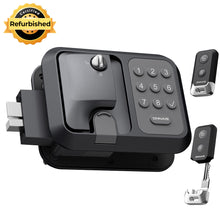
If your RV uses a compatible towable-style entry door, compare ONNAIS keyless RV door locks after confirming your door measurements.