RV Door Lock Sizes: Cutout, Thickness, Backset Guide
Measure RV door lock cutout, door thickness, latch distance, strike alignment, and screen-door clearance before choosing a replacement.

Quick answer: Most standard travel trailer and fifth wheel replacement locks use a cutout close to 3.75" H x 2.75" W and a door thickness around 1.25"–1.5". That is only the starting point: confirm the actual cutout, latch/backset distance, strike alignment, hinge side, screen-door clearance, and product exclusions before ordering.
If you’ve ever shopped for an RV entry door lock, you’ve probably seen the same number pop up everywhere: 3.75" x 2.75". And it’s tempting to treat it like a universal standard.
But RV lock “size” isn’t one measurement. It’s a fitment stack.
Yes—many travel trailer and fifth wheel replacement locks are built around a common rectangular opening. That’s why you’ll see brands repeat the same cutout spec. The problem is that a lock can match the cutout and still fail in real life: it won’t clamp your door thickness, the latch doesn’t line up with your strike pocket, the inside backplate hits your screen door, or the deadbolt rubs.
This guide gives you a quick-reference size chart, clear measuring steps, an ONNAIS Guard Series size comparison, and a troubleshooting section for the most common “looks right, won’t work” mistakes. If you are still comparing lock types, start with the RV door locks complete guide, then use this page as your fitment checklist before you browse the ONNAIS RV door locks collection.
RV Door Lock Size Terms: What You Actually Need to Measure

Before you compare products, you need consistent language. RV lock listings throw around terms like “cutout,” “opening size,” “backset,” and “door thickness”—and they don’t always mean what you think.
The safest approach: treat fitment as five checks that must all pass.
- Cutout size (the hole in the door)
- Door thickness (the clamp range)
- Latch / backset distance (how the latch relates to the door edge and strike)
- Strike alignment (where the latch lands)
- Clearance (screen door, window frame, trim, handle swing)
Cutout size: the hole in the door, not the outside plate

Cutout size is the rectangular opening in the door that the lock body passes through.
- Always record it as H x W (height first, then width).
- Be aware: many listings flip the order. Some say 3.75 x 2.75, others show 2.75 x 3.75.
Practical rule: write down both numbers plus the orientation (H x W), and take a photo with a ruler or tape measure in-frame. That one photo prevents most wrong-order purchases.
Door thickness: the clamp zone between the outside and inside lock halves

Door thickness is the distance between the outside and inside lock halves once installed.
Measure the door slab itself, near the lock area:
- Don’t include the weather seal/gasket.
- Don’t include raised trim or decorative skins that don’t compress evenly.
Why it matters:
- Too thin → the halves may not clamp tightly, screws can bottom out, and the lock can wobble.
- Too thick → screws/spindle/latch parts may not reach correctly, or the keypad/inside plate won’t sit flush.
Backset / latch distance: the edge-to-mechanism relationship

Here’s where RV shopping gets messy.
On a regular residential door, backset means the distance from the door edge to the center of the bore hole (often 2-3/8" or 2-3/4"). Lowe’s defines it as the “distance from the edge of the door to the center of the 2-1/8-inch bore hole” in its guide to measuring door backset.
But most RV entry locks aren’t a round-bore knobset. They’re a rectangular paddle/handle system. So instead of forcing the residential definition, focus on the RV-specific reality:
- How far the latch tongue/deadbolt reaches into the frame
- Whether the latch and deadbolt line up with your strike pocket
- The spec some RV lock brands publish as “door opening distance from latch”
In other words: for RV rectangular locks, the key question isn’t “Is it 2-3/8 or 2-3/4 backset?” It’s “Will the latch land cleanly in my strike pocket without lifting/pushing the door?”
Faceplate, screw holes, and gasket coverage

The faceplate is mostly about coverage and sealing.
- A large exterior plate can hide a rough or repaired cutout.
- But “it covers the hole” does not mean the lock body is properly supported inside the door.
Screw holes help, but they’re not the main fit dimension:
- Many replacement kits include new screws.
- If the door structure is compromised or the cutout is oversized, reused holes can actually make the lock less stable.
Strike plate and clearance
Two fitment checks get skipped the most:
- Strike alignment: the strike pocket position determines whether the door closes smoothly and the latch catches without forcing.
- Clearance: a lock can fit the cutout and thickness, but still fail if:
- the interior backplate hits the screen door
- the handle interferes with a window frame or trim
- the deadbolt rubs due to frame alignment
Common RV Door Lock Sizes: Quick Reference Chart

If you’re specifically trying to confirm travel trailer door lock size, start here—then move to the measurement steps below.
This chart is a starting point—not a guarantee.
One reason RV owners get burned is that “common” sizes show up across multiple lock families. The numbers can look similar while the latch geometry and strike alignment differ.
| Lock / Door Family | Common cutout / opening | Door thickness | Typical use | Fit warning |
|---|---|---|---|---|
| Standard towable paddle / keyless replacement | Often around 3.75" H x 2.75" W (sometimes listed W x H) | Often 1.25"–1.5" | Travel trailers, fifth wheels, many towables | Confirm latch/strike alignment, hinge side, and screen-door/window clearance |
| Listings that show “2-3/4" x 3-3/4" rough cutout” | Same family as above, shown width-first (RecPro lists “Rough Cutout: 2 3/4" x 3 3/4"” on its BP-35 page) | Varies by product | Towable replacements | Don’t assume order; measure your door opening H x W |
| Global Link / standard entry latch range | Often falls into a similar rectangular opening range | Often 1.25"–1.5" | Many travel trailer / fifth wheel replacement scenarios | Range ≠ universal; measure cutout + latch/strike |
| Bauer BP-8 style (common RV entry latch family) | Often referenced as 2.75" x 3.75" cutout | Verify per model | Standard RV entry doors | Check handedness and inside clearance |
| Motorhome / Class A/C larger-handle family | Can be much larger and OEM-specific | Varies | Many Class A / Class C | Not a drop-in replacement for towable locks |
| Class C 2-pin / specialty latch | Often product-specific openings and latch layouts | Varies | Some motorhome-style doors | Measure the old hardware and pin/latch layout |
| Baggage / slam latch / compartment lock | Different cutout families (square/cam-lock/slam-latch openings) | Often thinner doors | Storage compartments | Don’t confuse compartment locks with entry door locks |
If you’re shopping a towable replacement lock and it lists “3.75 x 2.75,” treat that as: “this might be the correct family”, not “this will fit my door.”
Cutout Size Deep Dive: How to Measure the Opening Correctly
(This section focuses on RV door lock cutout size—what it is, how listings format it, and how to measure it correctly.)
Why cutout size is the first gate
If the lock body can’t physically pass through the opening, nothing else matters. Cutout size is the first hard gate in fitment.
Measure height and width after loosening or removing the old lock
The most reliable method is to loosen or remove the old lock so you can see the real opening.
- Remove the interior screws.
- Pull the inside plate away.
- Measure the hole in the door, not the outside plate.
If you only measure the exterior faceplate, you’re measuring the cover—not the opening.
Watch corner radius, rough cuts, and old modifications
Not all cutouts are clean rectangles.
- Corners may have a radius (rounded) that can block a square-edged lock body.
- Some doors have been widened, filed, or repaired by previous owners.
- Uneven cuts can make a “close enough” measurement misleading.
If your measurement is close but not exact

Use this tolerance mindset before you drill or grind anything.
| Zone | What it means | User action |
|---|---|---|
| Green | Cutout matches product spec; straight edges; no repairs | Continue to thickness + latch/strike measurements |
| Yellow | Close but not exact; uneven edges; unknown repairs under trim | Verify with photos/support before buying |
| Red | Clearly smaller/larger; motorhome/glass/custom door; non-standard hardware | Don’t modify yet—confirm a model-specific fit first |
Door Thickness Deep Dive: Why 1/4 Inch Can Matter
(If you’re searching for RV door thickness for door lock fitment, this is the measurement that decides whether the lock halves clamp securely.)
Where to measure door thickness
Open the door and measure the slab near the latch area.
Avoid:
- compressible weather seals
- decorative trim that doesn’t represent the clamp zone
Take the measurement in at least two spots near the lock cutout. Doors can have slight variations.
What happens if the door is too thin
If your door is thinner than the lock’s clamp range:
- the halves may never cinch down tightly
- screws may bottom out before the lock is secure
- gaskets can compress unevenly, increasing water/dust ingress risk
What happens if the door is too thick
If your door is thicker than the lock is designed for:
- screws may not reach or may bind
- the spindle/latch mechanism can feel tight
- the keypad or inside plate may not sit flush
Don’t “solve” this by forcing longer screws unless the manufacturer explicitly supports it.
Screen-door clearance and backplate thickness

With keyless locks, thickness isn’t the only concern.
Your screen door needs clearance for:
- the interior backplate
- any protruding handle or thumb latch
ONNAIS Guard Series pages list a 40mm backplate thickness and include a screen-door-related note. Treat that as a hard reminder to do a clearance check before you order.
Backset, Latch Distance, and Strike Alignment: The Most Overlooked Fitment Check

(Many buyers search for RV door lock backset. In RV hardware, the more useful check is usually latch distance + strike alignment.)
If a lock “fits the hole” but doesn’t work on your RV, this is usually the reason.
What “backset” means in regular door hardware
On residential hardware, backset is the distance from the door edge to the center of the bore hole (often 2-3/8" or 2-3/4"). Lowe’s explains this clearly in its guide to determining door backset.
That definition is real—but it’s not always the most useful measurement for RV rectangular entry locks.
What RV shoppers usually mean by “backset”
When RV owners say “backset,” they’re usually trying to answer:
- Where does the latch tongue sit relative to the door edge?
- How far does it reach into the frame?
- Will it land inside the strike pocket cleanly?
Many RV product pages publish a measurement like “door opening distance from latch”. That spec is closer to what RV shoppers need than a residential bore-hole backset.
How to measure latch distance on an RV door
- Open the door and extend the latch/deadbolt (use the handle and the deadbolt switch).
- Identify a consistent reference point on the latch (for example, the leading edge of the latch tongue when extended).
- Measure from the door edge/opening to that reference point.
- Measure your strike pocket:
- height position (where the latch should land)
- depth (how much room the latch has)
- Close the door gently and watch whether the latch naturally enters the pocket.
If you have to slam the door, lift it, or push/pull the handle side to make it lock, you likely have alignment issues—not an electronics issue.
Same cutout, wrong strike: why the lock still fails

Common real-world symptoms:
- Door closes, but the latch does not catch.
- Deadbolt works when the door is open, but rubs when closed.
- You must push/pull/lift the door to lock it.
- Latch catches only halfway.
In many cases, the lock is “the right size” but the strike pocket is in the wrong place for the latch geometry.
Strike adjustment vs wrong lock size
Strike adjustment can help when:
- rubbing is minor
- the door shifts slightly with temperature/season
Strike adjustment usually cannot fix:
- latch geometry that doesn’t match your door/frame setup
- a cutout that’s significantly off-center
- a severely warped door or frame
Cutout vs Faceplate vs Screw Holes: Do Not Measure the Wrong Thing
Faceplate size can hide the real cutout
A larger faceplate can cover:
- chipped paint
- rough cuts
- old screw holes
But it can’t guarantee:
- the lock body is supported
- the latch lines up with the strike
- the gasket seals evenly
Screw holes are helpful, but not the main fit dimension
If screw holes don’t match perfectly, that doesn’t automatically mean “no fit.” Many kits include new hardware.
What matters more:
- cutout size
- door thickness
- latch/strike alignment
Gasket coverage and weather seal
If your door cutout is oversized or uneven, the gasket may not compress evenly even if the faceplate covers it.
That’s how you end up with a lock that “looks installed” but lets moisture in.
How to Measure Your RV Door Lock Before Buying

Tools you need
- Tape measure or ruler
- Screwdriver
- Phone camera
- Painter’s tape or marker
- Flashlight
Fast pre-check without removing the old lock
If you’re not ready to pull the lock yet, do this quick screening:
- Take photos of the exterior and interior plates.
- Record the current lock brand/model (if visible) and key code.
- Measure the exterior faceplate size (reference only).
- Measure door thickness at the lock area.
- Confirm hinge side (from the outside of the RV).
- Check screen door and window/trim clearance.
- If you cannot confirm the cutout, don’t order yet.
Confirmed measurement after loosening/removing the old lock
- Remove/loosen the interior screws.
- Measure the true cutout (opening) size.
- Record H x W.
- Measure door thickness at the cutout area.
- Measure latch distance / “door opening distance from latch” reference.
- Measure strike pocket height and depth.
- Take photos and save them.
The photo set to send support

If anything is borderline, this photo set resolves it quickly:
- Exterior plate with ruler
- Interior plate with ruler
- Cutout with ruler
- Door thickness with ruler
- Latch edge close-up
- Strike plate/pocket close-up
- Screen door partially closed showing clearance
- Hinge side from outside the RV
RV Type and Door Type Size Risk Map
This is a quick way to decide how cautious you need to be.
If you’re still deciding whether your door is in the common replacement family, see ONNAIS’ breakdown: Are RV door locks universal?.
| RV / door type | Size risk | Why |
|---|---|---|
| Travel trailer | Low to medium | Often uses common towable cutouts, but still measure latch/strike |
| Fifth wheel | Low to medium | Similar to travel trailers; screen/window clearance varies |
| Teardrop / small camper | Medium | Tight space around the lock; clearance matters more |
| Cargo / horse trailer | Medium | Cutout may match, but latch/strike style can differ |
| Truck camper | Medium | Door thickness and compact clearance vary |
| Class A motorhome | High | Often uses motorhome-specific handle family |
| Class C motorhome | High | 2-pin and automotive-style exceptions appear |
| Glass door / integrated window door | High | Construction and screw/latch path may not match |
| Custom / repaired / older doors | High | Previous modifications make spec matching harder |
ONNAIS Guard Series Size Guide: Guard SE vs Guard Pro vs Guard Smart

The Guard Series is designed around a common towable replacement-lock size—but it still has constraints (especially hinge handing and screen-door clearance). Product specs can change, so treat the live product page as the final source before ordering.
ONNAIS Guard Series fitment at a glance
| Product | Access / positioning | Door thickness | Hole cutout | Door opening distance from latch | Backplate thickness | Door type notes |
|---|---|---|---|---|---|---|
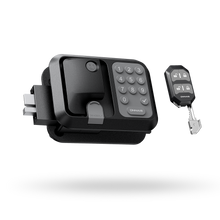
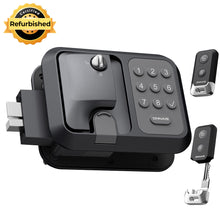
| ONNAIS Guard SE | Keypad + remote fobs + mechanical key | 1.25"–1.5" | H 3.75" x W 2.75" | 1.5" | 40mm (screen-door note) | Right-hinged only; not Class A; not Class C 2-pin; not glass; not left-hinged |
| ONNAIS Guard Pro | Keypad + remote fobs + mechanical key | 1.25"–1.5" | H 3.75" x W 2.75" | 1.5" | 40mm (screen-door note) | Fits most right-hinged RV doors; not Class A; not Class C 2-pin; not glass; not left-hinged |
| ONNAIS Guard Smart | App + keypad + remote fob + mechanical key | 1.25"–1.5" | H 3.75" x W 2.75" | 1.5" | 40mm (screen-door note) | Right-hinged only; not Class A; not Class C 2-pin; not left-hinged |
Which ONNAIS lock fits your size situation?
| Your measurements / need | Recommended path |
|---|---|
| Cutout H 3.75" x W 2.75", thickness 1.25"–1.5", right-hinged towable door, clearance OK | Guard SE / Pro / Smart are size candidates; choose by access method |
| Same cutout but tight screen-door clearance | Check the inside backplate clearance carefully before buying |
| Want app control and access sharing | Guard Smart (if hinge + clearance requirements match) |
| Want keypad + fobs without app focus | Guard SE or Guard Pro (choose by feature preference) |
| Class A, Class C 2-pin, left-hinged, glass/custom door | Don’t assume fit; verify with photos before purchase |
| Cutout smaller/larger than 3.75" x 2.75" | Don’t drill first; confirm a compatible lock family |
Measurement checklist before choosing Guard SE / Pro / Smart
- Is your actual cutout 3.75" H x 2.75" W?
- Is your door thickness 1.25"–1.5"?
- Is the door right-hinged from the outside?
- Is the latch distance / “door opening distance from latch” close to 1.5"?
- Will the 40mm inside backplate clear your screen door?
- Is your door not Class A / Class C 2-pin / left-hinged / glass, or have you verified compatibility on the current product page?
Why a Replacement RV Door Lock May Not Fit Even When the Size Looks Right

Use this matrix to troubleshoot before you start drilling or grinding.
| Symptom | Likely size / fit cause | What to check | What not to do |
|---|---|---|---|
| Lock body won’t enter the cutout | Cutout too small; corner radius mismatch; old routing | Measure true opening; inspect corners | Don’t grind until you confirm the correct lock family |
| Exterior plate covers the hole but lock feels loose | Old cutout oversized; door skin damaged | Check gasket coverage and door structure | Don’t rely on faceplate coverage alone |
| Screws bottom out | Door too thin or wrong screw length | Measure slab thickness | Don’t over-tighten until the door skin deforms |
| Screws won’t tighten / halves won’t meet | Door too thick; internal obstruction | Measure thickness; check spacers | Don’t force longer screws without manufacturer guidance |
| Latch won’t catch | Strike pocket too high/low/forward/back | Mark latch contact; adjust strike if minor | Don’t slam the door repeatedly |
| Deadbolt rubs when closed | Frame alignment or latch geometry mismatch | Compare open vs closed operation | Don’t file major material off first |
| Interior plate hits screen door | Backplate protrusion / clearance issue | Measure clearance with screen door closed | Don’t assume cutout fit means clearance fit |
| Keypad/fob works but door won’t lock | Mechanical alignment issue | Test key + deadbolt path; inspect strike | Don’t blame the battery first |
Spec Translation Table: What Product Pages Say vs What You Should Measure

| Product-page phrase | What it usually means | What you should measure |
|---|---|---|
| “Fits 3.75" x 2.75" openings” | Rectangular door cutout family | Actual cutout after loosening/removing old lock |
| “Fits doors 1.25"–1.5" thick” | Clampable door slab thickness | Slab thickness at lock area, excluding seals/trim |
| “Door opening distance from latch: 1.5"” | RV-specific latch/backset relationship | Door edge/opening to latch reference point + strike alignment |
| “Right-hinged doors” | Installation handing requirement | Hinges as viewed from outside the RV |
| “Not for Class A / Class C” | Different motorhome latch families | Old lock layout + cutout + latch type |
| “Not for glass doors” | Construction/clearance constraints | Door construction and surrounding trim |
| “Backplate thickness 40mm” | Interior protrusion | Screen-door clearance check |
Printable RV Door Lock Size Worksheet

Print this or screenshot it and fill it in before you order.
| Measurement | My RV | Product spec | Match? |
|---|---|---|---|
| Cutout height | ___ | ___ | Green / Yellow / Red |
| Cutout width | ___ | ___ | Green / Yellow / Red |
| Door thickness | ___ | ___ | Green / Yellow / Red |
| Latch / opening distance | ___ | ___ | Green / Yellow / Red |
| Strike pocket height | ___ | ___ | Green / Yellow / Red |
| Strike pocket depth | ___ | ___ | Green / Yellow / Red |
| Hinge side (outside view) | ___ | ___ | Green / Yellow / Red |
| Screen door clearance | ___ | ___ | Green / Yellow / Red |
| Window / trim clearance | ___ | ___ | Green / Yellow / Red |
| Old lock brand/model | ___ | ___ | Notes |
If any item is Yellow or Red, take photos before ordering.
FAQs About RV Door Lock Sizes
1) What is the standard RV door lock size?
Most towable RV replacement locks are built around a common rectangular cutout close to 3.75" tall x 2.75" wide. But “standard” doesn’t mean universal—always confirm cutout, thickness, latch/strike alignment, and clearance.
2) Are RV door locks all the same cutout size?
No. Many travel trailers and fifth wheels use a common opening, but motorhomes, glass doors, and specialty latches often use different hardware families and different openings.
3) Is 3.75" x 2.75" measured height first or width first?
It depends on the listing. Some pages list height first, others list width first. That’s why you should record H x W and take a photo.
4) How thick are most RV entry doors?
Many towable RV entry doors fall into a typical clamp range around 1.25"–1.5", but it varies by model and door construction. Measure the slab at the lock area.
5) What is backset on an RV door lock?
In residential hardware, backset is the distance from the door edge to the center of the bore hole (often 2-3/8" or 2-3/4"). For RV rectangular locks, what matters more is the latch/strike relationship and any “door opening distance from latch” spec.
6) Is backset the same as latch distance?
Not always. Backset is a specific residential definition; latch distance is a practical RV measurement that tells you whether the latch will land in your strike pocket.
7) How do I measure an RV door lock cutout without removing the old lock?
You usually can’t measure it perfectly without loosening the inside plate. If you won’t remove it yet, do a pre-check (photos, thickness, hinge side, clearance), but don’t order until you confirm the true cutout.
8) Can I install a keyless RV lock if my cutout matches?
Matching cutout is necessary, not sufficient. You still need door thickness compatibility, latch/strike alignment, and screen-door clearance.
9) Why does my RV lock fit the hole but not latch closed?
Most often: the strike pocket is too high/low/forward/back for the latch geometry, or the door/frame is slightly misaligned. Measure and inspect the strike pocket before blaming the lock.
10) Do standard RV door locks fit Class A or Class C motorhomes?
Often no. Many motorhomes use different lock families and openings. Treat Class A and Class C (especially 2-pin styles) as high-risk until you verify.
11) Do ONNAIS RV door locks fit glass doors or left-hinged doors?
The Guard Series product pages specify right-hinged fitment and list model-specific exclusions. Guard SE and Guard Pro exclude glass and left-hinged doors; Guard Smart excludes left-hinged doors and certain Class A / Class C 2-pin applications. Verify the current product page for your exact model before ordering.
12) Can I enlarge the cutout if the new lock is slightly bigger?
Only as a last resort, and only after confirming the lock family is correct and you’re comfortable with the risks. If the door is non-standard, it’s usually smarter to confirm a model-specific match before modifying the door.
13) Is faceplate size the same as cutout size?
No. Faceplate is the cover; cutout is the hole the lock body must fit through.
14) What photos should I send support to confirm fit?
Exterior plate, interior plate, cutout, door thickness, latch edge, strike pocket, screen door clearance, and hinge side (outside view)—each with a ruler in-frame.
Final Size Checklist Before You Buy

Before you order any RV entry door lock:
- Measure the cutout, not the faceplate.
- Measure door thickness at the lock area.
- Confirm latch distance / strike alignment (the most overlooked step).
- Confirm right/left hinge orientation from the outside.
- Check screen door, window, trim, and handle clearance.
- Compare against the exact product page specs, not a “standard size” assumption.
If your measurements match and you’re comparing keyless options, browse the ONNAIS RV door locks collection and then compare features between ONNAIS Guard SE, ONNAIS Guard Pro, and ONNAIS Guard Smart—but start with fitment first.