How to Install an RV Lock Kit: Step-by-Step Guide to Boost RV Lock Security

Your RV is more than just a vehicle—it’s your home on wheels, and protecting it should always be a top priority. Whether you’re parked at a campground or storing your RV off-season, having reliable locks is essential for keeping your belongings and family safe. Over time, RV locks can wear out, become damaged, or simply no longer meet modern security standards. This is where an RV lock replacement kit comes in.
Learning how to install an RV lock kit is a practical and affordable way to upgrade your security. With the right tools and a bit of DIY confidence, you can perform a professional-quality RV lock installation that ensures peace of mind every time you lock your door.
In this guide, we’ll walk through the complete process, from the tools you need to detailed installation steps, safety tips, and answers to common questions.
Tools and Materials Required
Before you begin, gather the following tools and materials:
Essential Tools:
Phillips Head Screwdriver: The most common tool for this job.
Flat Head Screwdriver: Useful for prying off trim plates or gaskets without damaging them.
Socket Set and Wrenches: For handling nuts on the back of the lock assembly.
Drill with Bits: In case you need to enlarge any holes for a new lock model (less common with direct replacement kits).
Needle-Nose Pliers: For gripping small parts or adjusting linkages.
Safety Glasses: Always protect your eyes from metal shavings or debris.
Work Gloves: To protect your hands from sharp edges.
Materials:
Your New RV Lock Replacement Kit: Ensure it’s specifically designed as a replacement for your RV make and model.
Silicone Sealant (optional but recommended): To weatherproof the new installation and prevent water leaks.
Rubbing Alcohol and a Clean Rag: For cleaning the surface before applying new sealant.
Painter’s Tape (optional): To protect the surrounding area from scratches.
Pro tip: Always double-check that your RV lock kit is compatible with your RV model. RV doors vary in thickness, so verify measurements before purchasing.
Step-by-Step RV Lock Installation
Follow these steps carefully to ensure your lock is secure and functions properly:
Step 1: Prepare the Work Area
Park your RV on a level surface and ensure the door is fully accessible.
Remove any obstructions near the door, such as awnings, chairs, or storage bins.
Put on safety gloves and glasses before handling tools.
Step 2: Remove the Old Lock
Open the RV door to access both sides of the lock.
Using a Phillips screwdriver, remove the screws holding the lock assembly in place.
Gently pull apart the interior and exterior pieces of the old lock.
If the lock sticks, use a flat-head screwdriver to ease it out, but avoid damaging the door frame.

Step 3: Clean and Inspect the Lock Opening
Wipe down the area where the lock sat to remove dirt, rust, or old adhesive.
Inspect the cutout for damage. If you notice cracks or splinters, sand lightly or repair with filler before installing the new lock.
Check that the cutout size matches your new lock. If adjustments are needed, measure carefully and trim with the appropriate tool.
Step 4: Test-Fit the New Lock
Insert the exterior portion of your new RV lock kit into the cutout.
Make sure it sits flush with the door surface and aligns with the latch opening.
If it doesn’t fit properly, recheck measurements before proceeding.
Step 5: Install the Exterior Lock Assembly
Position the exterior lock assembly against the door.
Hold it in place with painter’s tape if working alone.
Ensure the latch mechanism extends smoothly into the door frame.

Step 6: Attach the Interior Lock Assembly
Align the interior plate with the exterior assembly.
Insert the provided screws and tighten evenly using a screwdriver.
Avoid overtightening, as this may strip the screws or warp the door surface.
Step 7: Test Lock Functionality
Close the RV door and test the new lock from both inside and outside.
Ensure the latch engages smoothly and the deadbolt locks securely.
Insert the key to verify it turns without resistance.
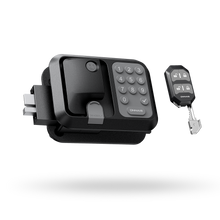
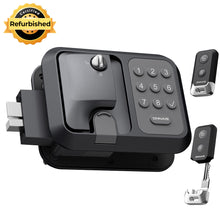
For electronic locks: After installing the batteries, test the keypad by entering the default code and confirm the door unlocks. Then, test the key fob (if included) to ensure remote locking and unlocking work properly.

Step 8: Apply Final Adjustments and Lubrication
Spray a small amount of silicone lubricant inside the lock for smooth operation.
Check that the strike plate aligns with the latch; adjust if necessary.
Re-tighten screws if any parts feel loose.
Safety Tips for Installing an RV Lock Kit
Disconnect power: If your lock has an electronic keypad, disconnect RV power before installation to avoid short circuits.
Work slowly: Rushing increases the risk of misalignment or stripping screws.
Use the right tools: Avoid using oversized drills or incorrect screwdrivers, which can damage your lock or door.
Test thoroughly: Always double-check both manual and key functions before considering the job complete.
Secure spare keys: After installation, store spare keys in a safe place outside your RV, such as a lockbox.
Frequently Asked Questions (FAQs)
Q1: How do I know if my RV needs a lock replacement?
If your lock sticks, the key doesn’t turn smoothly, or you’ve lost track of spare keys, it’s time to consider a replacement. Upgrading also makes sense if you want improved RV lock security.
Q2: How long does it take to install an RV lock kit?
For most DIYers, the process takes 30–60 minutes. Extra time may be needed if your door cutout requires adjustment.
Q3: Can I install a keyless RV lock kit using the same steps?
Yes, the general steps are the same. However, electronic locks may require battery installation or wiring. Always follow the manufacturer’s manual in addition to this guide.
Q4: Do all RV locks fit every RV door?
No. RV doors come in different thicknesses, usually between 1¼ and 1½ inches. Always measure your door and purchase a compatible RV lock kit.
Q5: Should I hire a professional instead?
If you’re uncomfortable with tools or your RV has a complex security system, a professional installer may be the safer choice. But for most standard RV door locks, DIY installation is safe and cost-effective.
Conclusion
Replacing your RV lock may seem like a small upgrade, but it plays a big role in protecting your family, belongings, and peace of mind. By following this guide, you now know how to install an RV lock kit with confidence. The process is straightforward: remove the old lock, prepare the cutout, fit the new assembly, and test for proper operation.
Whether you choose a traditional keyed lock or a modern keyless option, taking the time to perform a proper RV lock installation ensures long-term security and convenience.