RV Security Systems: Locks, Cameras, Alarms and GPS Trackers
Build an RV security system with compatible locks, cameras, alarms and GPS tracking. Compare power, alerts, costs and setup options.

RV Security Systems: Locks, Cameras, Alarms and GPS Trackers
An RV security system is a coordinated set of physical and electronic components that work together to protect your rig. The core includes entry locks and immobilizers to control access and movement, sensors and alarms to detect activity, cameras to verify and document events, and GPS or cellular trackers to support location and recovery. No setup prevents all theft, but layering these defenses makes your RV a harder target than the one parked next to it.
This guide walks you through the four-layer architecture that makes a system actually work, shows you how to match components to your RV type and travel pattern, and gives you the failure-mode matrix and commissioning tests you need before you trust any of it on the road.
Top 3 Complete RV Security Systems (2026)
If you want a pre-packaged system instead of building your own, here are the three most recommended complete solutions for RVs, with honest pros and cons for mobile living:
1. SimpliSafe RV Security System
What you get: Wireless hub, door/window sensors, motion detector, keypad, 105dB siren, cellular connection, professional monitoring option.
RV-specific pros:
- Cellular backup works when campground Wi-Fi fails or requires captive portal login
- Battery-powered sensors (no drilling for power)
- Professional monitoring optional (self-monitoring is free)
- Easy to move sensors between rigs or seasonal sites
RV-specific cons:
- No built-in cameras (sold separately and require separate app)
- Motion sensors may struggle with RV vibration and pet movement
- Cellular subscription required for remote alerts ($19.99/month with monitoring, $9.99/month self-monitoring)
- Not designed for extreme temperature swings common in storage
Best for: Full-timers and frequent travelers who want professional monitoring and cellular reliability without building a custom system.
Estimated first-year cost: $245 base kit + $120-240 monitoring = $365-485 (equipment + 12 months service)
2. Ring Alarm Security Kit
What you get: Base station, keypad, contact sensors, motion detector, range extender, 24/7 professional monitoring option, integrates with Ring cameras.
RV-specific pros:
- Works with Ring cameras you may already own (shared app, timeline view)
- Battery backup on base station (keeps working during power loss)
- Affordable professional monitoring ($20/month includes camera cloud storage)
- Geofencing can auto-arm when you leave the rig
RV-specific cons:
- Requires Wi-Fi for setup and remote alerts (no cellular backup in base Ring Alarm kit)
- Range extender often needed in larger motorhomes or fifth-wheels
- Sensors designed for stationary homes, not constant RV vibration
- Cold weather performance below 32°F not guaranteed
Best for: Campers who stay in sites with reliable Wi-Fi and want affordable monitoring with camera integration.
Estimated first-year cost: $200 base kit + $240 monitoring (optional) + Ring cameras (if needed) = $440-740
3. ADT RV Security (Professional Installation)
What you get: Professionally installed sensors, control panel, cellular connection, 24/7 monitoring, optional cameras, integration with ADT smart home ecosystem.
RV-specific pros:
- Professional installation handles wiring, placement, and RV-specific mounting challenges
- Cellular monitoring (no Wi-Fi dependency)
- Fastest police/fire dispatch response (monitoring center relationship with local authorities)
- Covers RV-specific risks (propane leak detection, temperature monitoring available)
RV-specific cons:
- Highest upfront cost ($400-800 installation + equipment)
- Requires 36-month monitoring contract ($50-60/month)
- Installation appointment and service availability varies by region
- Equipment stays with the RV (not portable between rigs)
Best for: Full-timers with high-value rigs who want professional installation, fastest emergency response, and don't mind long-term contracts.
Estimated first-year cost: $600 installation/equipment + $600-720 monitoring = $1,200-1,320
How These Compare to Building Your Own
All three systems prioritize ease of setup over customization. You get a working alarm system in under an hour without researching compatibility, but you sacrifice control over exactly which cameras, locks, and trackers you use.
What's missing from all three:
- None include GPS tracking (you'll need a separate tracker like LandAirSea or Spytec)
- None include RV-specific entry locks (SimpliSafe and Ring work with your existing locks)
- None address hitch security, wheel locks, or steering-wheel immobilization
- Camera night performance and RV-specific mounting challenges vary by model
When a complete system makes sense: You want professional monitoring, you're not comfortable researching individual components, and you prioritize fast setup over customization.
When building your own makes sense: You have specific compatibility requirements (door thickness, hinge direction, cellular dead zones), you want to choose exactly which cameras and locks work for your rig, or you're willing to invest time in commissioning tests to save on monthly fees.
The rest of this guide shows you how to build and test your own system with full control over every component. If you choose one of the complete systems above, skip to the Device Placement Guide and Testing Your System sections to verify your installation actually works.
Choose an RV Security System in 60 Seconds
The right system depends on how you use your rig. Here's where to start based on your situation:
| Use Case | Primary Risk | Minimum Layers | Power Assumption | Connectivity | First Upgrade | Verify Before Buying |
|---|---|---|---|---|---|---|
| Storage (home or facility) | Trailer moved, entry forced | Hitch lock, entry lock, GPS tracker | Battery-powered devices | Cellular for tracker | Door/window sensors | Storage site allows GPS signal, fits cutout, subscription active |
| Campground touring | Cab or entry access, visible valuables | Entry lock, exterior camera, local alarm | Shore power or house battery | Wi-Fi or cellular | Motion-activated lighting | Camera works without Wi-Fi, door thickness 1.25-1.5", alarm audible range |
| Boondocking | Entry forced, no help nearby | Entry lock, local alarm, local-recording camera | Battery or solar | Cellular (if available) | Backup battery pack | Low-power mode, local storage, cellular dead-zone behavior |
| Full-time living | Entry during errands, compartment access | Entry lock, interior camera, alarm system | Shore power with battery backup | Wi-Fi preferred | Compartment locks | Pet-immune motion sensors, emergency contacts set, privacy boundaries |
| Motorhome cab security | Steering column, ignition access | Steering-wheel lock, tilt sensor, dash camera | 12-volt or battery | Cellular or local recording | Glass-break sensor | Fits steering wheel diameter, mounts securely, recording trigger works |
| Towable trailer security | Entire trailer moved | Hitch lock, wheel lock, GPS tracker | Battery-powered tracker | Cellular required | Audible alarm on door | Coupler size match, tracker concealed but signal clear, geofence set |
Don't look for one universal winner. Pick the layers that address your actual risks, then verify fit, voltage, network support, subscription requirements, temperature limits, and mounting constraints before you buy.
The Four Layers of RV Security
A working RV security system isn't one device. It's four distinct layers, each handling a job the others can't. Here's how they stack:
Layer 1: Control access and movement. Entry locks, compartment locks, hitch or coupler locks, wheel locks, and steering-wheel locks. These slow or stop someone from getting in or moving the entire rig. A lock on your entry door secures that opening. A hitch lock keeps the trailer from rolling away. They do different jobs.
Layer 2: Detect and draw attention. Door and window contacts, vibration or tilt sensors, glass-break sensors, motion sensors, and audible sirens. These alert you (and everyone nearby) that something's happening. A local siren blares whether or not you have cell service. A remote notification requires a working network connection.
Layer 3: Verify and preserve evidence. Exterior and interior cameras with day and night performance, local or cloud storage, timestamps, and notification clips. A camera shows you what happened but doesn't physically stop entry. Viewing angle, night visibility, and where the footage actually saves all matter when you need to hand something to law enforcement or your insurer.
Layer 4: Locate and support recovery. GPS or cellular trackers (not Bluetooth item trackers like AirTags). These report location at intervals over cellular networks, let you set geofence alerts, and provide coordinates you share with authorities. You need a subscription, the tracker needs battery or hardwired power, and you do not attempt recovery yourself.
Each layer amplifies the others. A lock without an alarm gives you no warning. An alarm without a camera gives you no proof. A camera without a tracker doesn't help if the rig disappears. Build all four if your risk justifies it, or start with the two that address your biggest threat and add from there.
Layer 1: Control Access and Movement
Locks and immobilizers are the physical barrier. They slow entry, prevent operation, or make moving the rig difficult enough that a thief picks an easier target.
Entry locks replace or upgrade the factory latch on your main RV door. Keyless models use a keypad, remote fob, or app in addition to a mechanical backup key. Compartment locks secure baggage bays, generators, and propane access. Hitch or coupler locks prevent a travel trailer or fifth-wheel from being coupled and towed. Wheel locks immobilize one or more wheels. Steering-wheel locks prevent turning in a motorhome. Key control means you track who has physical or digital access and rotate codes when someone leaves your circle.
The difference between securing entry and preventing movement: an entry lock stops someone from opening the door. A hitch lock stops the trailer from being hooked to a truck. One doesn't replace the other. For a deeper look at fit, replacement, and maintenance, use the RV door lock guide alongside this system-level checklist.
Layer 2: Detect and Draw Attention
Sensors and alarms tell you (or anyone within earshot) that something triggered. Door and window contacts detect opening. Vibration or tilt sensors catch forced entry or the rig being lifted. Glass-break sensors listen for the sound of shattering. Motion sensors detect movement inside or outside. Audible sirens make noise locally.
A local alarm works whether or not you have internet. A remote alert (push notification, text, or email) requires the sensor hub, a network connection, and your app or monitoring service to all be working. If you're relying on remote alerts when you're away from the rig, test the entire chain: trigger the sensor, confirm the alert arrives on your phone, and measure how long it takes.
Separate a local response from a remote one. If shore power dies or Wi-Fi drops, you need to know what still functions and what goes silent.
Layer 3: Verify and Preserve Evidence
Cameras don't stop entry. They record it. That footage helps you confirm a real event (not a wind-blown door), document what was taken, and provide evidence to law enforcement and your insurance company.
Exterior cameras cover the approach, entry points, and perimeter. Interior cameras show what happened inside. Viewing angle determines blind spots. Night performance (infrared or low-light sensors) matters because most break-ins happen after dark. Local storage (SD card or onboard DVR) keeps recording when the internet is down. Cloud storage backs up footage offsite but requires connectivity and often a subscription. Timestamps prove when something happened. Notification clips push a short video to your phone when motion is detected, if the camera supports it and has connectivity.
One frustration: a camera advertised as "Wi-Fi" may not work unattended on campground Wi-Fi, which often requires a captive-portal login every 24 hours or throttles bandwidth. Cellular cameras bypass that problem but add a data subscription.
Layer 4: Locate and Support Recovery
A dedicated GPS or cellular tracker reports your RV's location over a cellular network at intervals you choose (every few minutes, hourly, or when the geofence is breached). This is not the same as a Bluetooth item tracker like an AirTag.
How it works: The tracker uses satellite positioning (GPS) to determine location and a cellular connection to transmit that data to the cloud. You log into the app or web portal to see where your rig is. Geofence alerts notify you when the RV leaves a boundary you drew on the map. Update intervals trade battery life for freshness; a tracker that reports every 5 minutes drains faster than one that reports hourly. Power is either internal battery (which you have to recharge or replace) or hardwired to 12-volt. Subscription status has to stay current or the tracker goes silent. Concealment matters so it's not found and removed, but you have to mount it where it still gets a cellular and GPS signal. Account access means you keep your login current and have a documented way to share coordinates with law enforcement.
Apple's AirTag uses Bluetooth and the crowdsourced Find My network to show approximate location. It does not use GPS or cellular and is not designed for vehicle recovery. If someone recommends an AirTag for RV tracking, they don't understand how it works. Use a dedicated tracker with its own cellular connection.
Recovery workflow when your RV is missing: Confirm it's actually gone (not borrowed by a family member or moved by the storage facility). Preserve all alerts, footage, and tracker data. Contact local law enforcement and your insurer immediately. Share tracker coordinates and camera evidence through official channels. Do not drive to the location and confront anyone yourself.
Locks and Immobilizers: Build the Physical Layer First
The physical layer is your first line of defense. Here's how the main lock and immobilizer types compare:
| Device Type | Purpose | Compatible RV Type | Installation | Access Method | Failure or Bypass Risk | Maintenance |
|---|---|---|---|---|---|---|
| Entry door lock | Secure main or secondary entry door | Travel trailer, fifth-wheel, motorhome (check cutout and hinge direction) | Replace existing lock; requires cutout match, correct door thickness, and hinge compatibility | Keypad, remote fob, app (if smart lock), mechanical key backup | Code sharing, key loss, battery depletion, cutout mismatch, weather damage | Check batteries every 3-6 months, test backup key, verify weatherproofing seals |
| Compartment lock | Secure baggage, generator, propane access | All RV types | Replace cam lock or add hasp and padlock | Key, combination dial, or padlock | Prying, cutting, key loss, corrosion | Lubricate annually, inspect mounting hardware, replace corroded units |
| Hitch or coupler lock | Prevent trailer from being coupled and towed | Travel trailer, fifth-wheel | Fits over coupler or into receiver; match coupler size exactly | Key | Cutting, drilling, wrong size allows removal | Inspect for rust, verify coupler size match, store key separately from RV |
| Wheel lock | Immobilize one or more wheels | Travel trailer, fifth-wheel, motorhome | Clamp or boot over wheel and tire | Key or combination | Cutting, removal with jack and dolly, incorrect fit allows slip | Check fit annually, store indoors to prevent rust |
| Steering-wheel lock | Prevent steering operation in motorhome cab | Motorhome (Class A, B, C) | Bar across steering wheel | Key or combination | Cutting, steering-wheel removal, incorrect diameter fit | Verify diameter match, store in cab, inspect locking mechanism |
RV Entry Door Lock Fit Checklist
Before you order any keyless RV door lock, measure and verify:
- Door thickness: 1.25 to 1.5 inches is standard; thinner or thicker doors won't work
- Cutout dimensions: Most aftermarket locks need 3.75 inches high by 2.75 inches wide
- Hinge direction: Right-hinged (hinges on the right when you're outside looking at the door) is most common; many locks exclude left-hinged doors
- Door opening distance from latch: The latch needs at least 1.5 inches of clearance to throw fully
- RV class exclusions: Some locks explicitly exclude Class A RVs, Class C two-pin door types, or glass doors
- Screen door clearance: If you have a screen door, check that the interior lock assembly (often 40mm thick) won't block it from closing
One lock that misses on hinge direction or cutout size wastes your time and return shipping. Measure before you order.
ONNAIS Guard Smart: One Access-Control Example
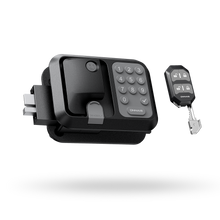
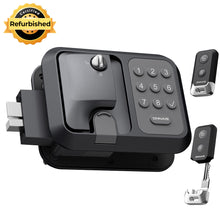
The ONNAIS Guard Smart RV Keyless Entry Door Lock is one option for the access-control layer. It's not a complete RV security system by itself, and it doesn't guarantee theft prevention. Here's what it does:
Four access methods: Bluetooth app, keypad password, remote key fob, and mechanical key backup. If the batteries die and you don't have the backup key, the emergency power port accepts temporary external power to unlock.
What the app controls (via Bluetooth, not internet): Lock or unlock the door, check battery level, manage key fobs, view operation history, create one-time passwords (up to 10), share access with users you register, and adjust backlight and sound settings. The Bluetooth app does not give you remote monitoring from across the country. It works when you're within Bluetooth range of the lock.
Anti-peeping password entry: Enter random digits before or after your correct password (up to 32 digits total) to prevent someone from watching you and learning your code.
Verified specifications as of August 16, 2026: Requires a 3.75-inch-high by 2.75-inch-wide cutout, door thickness of 1.25 to 1.5 inches, a right-hinged compatible entry door, and correct latch clearance geometry. Four AA batteries (not included). Weather-resistant exterior. Internal deadbolt mechanism.
Compatibility warning: Not universal. The current product page excludes Class A RVs, Class C two-pin door types, and left-hinged doors. If your door doesn't meet these requirements, this lock will not fit. Before ordering any model, check whether an RV door lock will fit on your specific rig.
What Guard Smart is not: It is not fully waterproof without an official IP rating. Bluetooth app control is not long-range internet monitoring. An access log shows who unlocked the door and when, but it does not prove an intrusion occurred. A lock does not replace alarms, cameras, trackers, insurance, or safe parking decisions. It controls one entry point in a larger system.
Sensors and Alarms: Decide What Happens Locally
Sensors detect activity. Alarms respond. The difference between a local-only alarm and a connected system determines what happens when you're not there.
| Sensor Type | Trigger | False-Alert Risk | Power Source | Local Siren | Remote-Alert Path | Best Placement |
|---|---|---|---|---|---|---|
| Door/window contact | Magnet separation when opened | Low (unless loose mount) | Battery (CR2032 or AA) | Via hub | Via hub to app or monitoring service | Entry door, secondary doors, accessible windows, emergency exits |
| Motion detector | Infrared heat movement | Medium to high (pets, sun heating surfaces, HVAC airflow) | Battery or 12-volt | Via hub | Via hub | Interior hallway aimed at entry, living area (use pet-immune models if you have animals) |
| Glass-break sensor | Sound frequency of breaking glass | Low to medium (loud impact nearby) | Battery | Via hub | Via hub | Near large windows or cab windshield (test with actual glass-break sound, not hand clap) |
| Vibration/tilt sensor | Physical shock or angle change | Medium (wind, passing trucks, road vibration at highway rest stops) | Battery | Via hub | Via hub | Mounted on frame or floor, not a flexible panel (test sensitivity during setup) |
| Audible siren | Triggered by hub or standalone door contact | N/A (output device) | Battery or 12-volt | Self (local sound) | None (local only) | Interior ceiling or exterior under overhang (weatherproof model), loud enough to hear across campground |
Local-only alarms: A door contact wired directly to a battery-powered siren makes noise when the door opens. No hub, no app, no subscription. It works if shore power is gone, if Wi-Fi is down, and if your phone is off. The siren alerts people nearby. You won't know about it until you return or someone calls you.
Connected alarms: Sensors talk to a hub, the hub processes the signal, and then it triggers a local siren and sends a notification to your phone or a monitoring center. This requires the sensors, hub, hub power, network connection (Wi-Fi or cellular), and your app or service account to all be functioning. When it works, you know immediately. When any link fails, you don't.
Arming modes: Most hubs support "Away" (all sensors active), "Home" (entry sensors active, interior motion disabled so you can move around), and "Disarmed." If you're inside the RV with pets, you want interior motion off. If you're gone for the day, you want everything armed.
Entry versus interior detection: Entry sensors on doors and windows catch someone opening them. Interior motion sensors catch movement once someone is already inside. Both together give you two chances to detect intrusion, but motion sensors inside will false-alert on pets, HVAC-driven curtain movement, or shifting items unless you tune the sensitivity.
Siren placement: Interior sirens are loud in a small RV space. Exterior sirens alert the campground but may be disabled by cutting wires if they're accessible. A combination (interior siren that can't be reached from outside, backup exterior siren under the rig or in a locked compartment) is harder to silence.
Tamper alerts: Some sensors notify you if their cover is removed or they lose contact with the hub. That's useful if someone finds and tries to disable them.
Before recommending any specific sensor or hub, verify from the current manufacturer manual: operating temperature range (many fail below 32°F or above 120°F), mounting surface compatibility (some adhesives fail on textured RV walls), hub dependency (can it work standalone or does it require a proprietary hub), and notification behavior (does it alert immediately or batch notifications).
RV Security Cameras: Match the Camera to Power and Network Reality
Not all RV security cameras are the same. How they're powered and how they transmit footage determines what works when you're boondocking, touring, or parked without shore power.
| Camera Type | Power | Recording When Internet Unavailable | Remote Viewing | Mounting and Weather | Data Use | Storage Retention | Recurring Costs |
|---|---|---|---|---|---|---|---|
| Wi-Fi camera (plug-in) | 120V AC shore power or inverter | Local SD card if supported; otherwise no recording | Requires Wi-Fi connection | Indoor or weatherproof outdoor housing; requires nearby outlet or power routing | Medium to high (constant streaming when viewing live) | Cloud: subscription-dependent; Local: SD card size (typically 32GB to 128GB, 3-7 days continuous) | Cloud storage subscription (usually $3-10/month per camera) |
| Wi-Fi camera (battery) | Internal rechargeable battery | Local SD card if supported; triggers recording on motion only | Requires Wi-Fi connection | Weatherproof for outdoor; easier mounting (no wiring) | Low to medium (motion-triggered uploads) | Cloud: subscription-dependent; Local: SD card (days to weeks depending on activity) | Cloud storage subscription; battery recharge every 2-6 months depending on activity |
| Cellular camera | Battery, solar-assisted, or 12-volt | Yes, stores locally and uploads when cellular available | Works over cellular network (4G LTE or 5G) | Weatherproof; mounts anywhere with cell signal | Medium (motion clips uploaded over cellular) | Cloud: included with data plan; Local: SD backup | Cellular data plan (typically $10-25/month) |
| 12-volt wired camera | RV house battery via 12V connection | DVR or NVR system records locally | Via DVR/NVR network port if connected to Wi-Fi or cellular hotspot | Requires wiring to each camera location | Low (local network only unless remote access enabled) | Local DVR/NVR hard drive (1TB to 4TB, weeks to months) | Optional: cloud backup subscription |
| Local-recording only (no Wi-Fi) | Battery or 12-volt | Yes, continuous or motion-triggered to SD card | No remote viewing; must retrieve SD card or connect directly | Simplest install; no network dependency | None | SD card size (typically 64GB to 256GB, 1-4 weeks) | None (one-time purchase) |
| Solar-assisted battery camera | Solar panel charges internal battery | Local SD card; uploads clips when connectivity available | Requires Wi-Fi or cellular (model-dependent) | Outdoor only; requires sun exposure; weatherproof | Low to medium (motion-triggered) | Cloud or local depending on model | Subscription if cloud-enabled |
Campground Wi-Fi reality: Weak signal, captive portal logins that expire every 24 hours, bandwidth throttling, and blocked ports all interfere with camera access. A camera labeled "Wi-Fi" may connect to your phone when you're both on the same campground network, but it won't send alerts or let you view footage from across the country unless the campground network allows outbound connections and you have the camera configured for remote access. Many don't.
If you plan to monitor your RV remotely while it's parked at a campground, test whether the camera can actually send alerts and stream video over that specific campground's Wi-Fi before you rely on it. Cellular cameras skip this problem entirely.
Night vision: Infrared LEDs or low-light sensors. Infrared shows a black-and-white image and lights up reflective surfaces (license plates, road signs). Low-light color sensors work in dim conditions but go dark in total blackness. Check sample night footage from the manufacturer, not marketing claims.
Mounting and weather constraints: Outdoor cameras need weatherproof housings (look for IP65 or IP66 ratings, not just "weather-resistant" claims). Mounting on fiberglass, aluminum, or rubber roofs requires different hardware. Cameras mounted under slide-outs or awnings stay drier but have limited view angles. Cameras on the roof see farther but take more weather abuse.
Recording triggers: Continuous recording fills storage fast. Motion-triggered recording saves space but may miss the first second of activity. Some cameras offer both: continuous recording with motion-tagged clips for easy searching.
Battery behavior: Battery-powered cameras in cold weather (below 40°F) drain faster and may stop working entirely below 32°F unless rated otherwise. Cameras in direct summer sun overheat and shut down. Check the operating temperature range in the manual, not the product page.
Before you buy any camera, verify from the current product page or manual: power requirements, operating temperature range, network requirements (Wi-Fi only, cellular, or both), storage options (local SD, cloud, or both), subscription costs, and whether remote viewing actually works without a paid plan.
RV GPS Trackers: Understand What Can Actually Be Located
A GPS tracker on your RV reports location over a cellular network. It's not the same as a Bluetooth item tracker.
How dedicated GPS/cellular trackers work: The device uses GPS satellites to determine its location, then transmits that data over a cellular connection (4G LTE or 5G) to a cloud service. You log into the app or web portal to see where your RV is. The tracker reports location at intervals you set (every 5 minutes, every hour, or only when a geofence boundary is crossed). More frequent updates drain battery faster.
Power options: Internal battery (needs recharging or replacement every few weeks to months depending on update frequency) or hardwired to your RV's 12-volt system. Hardwired trackers don't run out of battery but stop working if someone disconnects your house battery or cuts the wire.
Cellular subscription: Required. The tracker can't transmit without an active cellular plan. Expect $10 to $25 per month. If the subscription lapses, the tracker goes silent. Check whether the subscription is month-to-month or requires an annual commitment.
Geofence alerts: Draw a boundary on the map (around your storage facility, campground, or driveway). The tracker notifies you if the RV leaves that area. You set the size and shape.
Concealment: The tracker has to be hidden well enough that a thief doesn't find and remove it, but not so buried that cellular and GPS signals are blocked. Metal compartments, thick insulation, and locations under the rig near the exhaust all interfere with signal. Test signal strength and location accuracy at the intended mounting spot before you finalize installation.
Bluetooth item trackers (like Apple AirTag): These use Bluetooth and the Find My network to show approximate location. An AirTag does not have GPS or cellular. It relies on nearby iPhones detecting its Bluetooth signal and anonymously reporting that location to Apple's network. In a populated area, this can work. In a remote storage lot or along a highway, there may be no iPhones nearby to relay its position. Apple's current AirTag support page describes this as a Bluetooth-based crowdsourced network for approximate location, not a vehicle recovery tool. If someone recommends an AirTag for RV tracking, they don't understand how it works.
Recovery workflow: When you realize your RV is missing, confirm it's actually gone (not borrowed by a family member, moved by storage staff, or towed for repair). Preserve all tracker data, alerts, and camera footage. Contact local law enforcement and your insurance company immediately. Provide tracker coordinates and evidence through official channels. Do not drive to the location yourself and attempt to confront anyone or recover the RV. That's law enforcement's job, and showing up at a tracker location can be dangerous.
Can you put a GPS tracker on your RV? Yes, as long as you own the RV or have the owner's explicit permission. Installing a tracker on someone else's vehicle without consent is illegal in most jurisdictions.
Power, Connectivity, and Alert Failure Modes
Your RV security system depends on power and connectivity. When either one fails, parts of the system go silent. Here's what stops working and what keeps running in common failure scenarios:
| Failure Event | Affected Components | What Still Works | What Stops Working | Alert Visible to Owner | Backup Action |
|---|---|---|---|---|---|
| Shore power disconnected | 120V AC plug-in cameras, Wi-Fi router, any device without battery backup | Battery-powered sensors, cameras, and trackers; 12-volt devices on house battery; local recording to SD or DVR | Plug-in cameras stop recording; Wi-Fi router goes down (kills remote alerts from Wi-Fi devices) | No (unless you have a shore-power monitor that alerts separately) | Install battery backup for router and cameras, or switch to battery/cellular cameras |
| House-battery disconnect switch off | 12-volt cameras, alarms wired to house battery, hardwired GPS tracker | Battery-powered sensors and cameras; devices on shore power | 12-volt cameras stop recording; hardwired tracker goes silent; 12-volt alarm system offline | No (unless tracker or alarm has separate low-power alert before shutdown) | Use battery-powered devices for critical zones; test what runs on house battery versus chassis battery |
| Camera battery depleted | That specific camera | All other devices | That camera stops recording and sending alerts | Some cameras send low-battery warning before dying; others go silent | Check battery level weekly via app; set up low-battery alerts if supported |
| Router or hotspot rebooted | Wi-Fi-dependent cameras, sensors, and hubs | Devices with cellular backup; devices that record locally | Remote alerts stop until devices reconnect; cloud uploads pause | No (unless you notice lack of alerts or check app) | Use cellular cameras for exterior; local recording as backup |
| Campground Wi-Fi login expired | Wi-Fi cameras and hubs that require internet | Local recording; cellular devices; local alarms | Remote viewing and alerts stop | No (you may notice when you try to view footage) | Re-login to campground Wi-Fi; use cellular backup; accept that remote monitoring may not work |
| Cellular dead zone | Cellular cameras, GPS trackers | Local recording on cameras; local alarms; Wi-Fi devices if connected | Cellular cameras can't upload; GPS tracker can't transmit location | No (tracker may show last known location; camera stores locally) | Choose parking spots with verified cellular signal; test signal before relying on it; use local recording |
| App signed out | Remote access to all smart devices | Devices continue recording and triggering locally | You don't receive alerts or view footage remotely | No (you realize when you check the app) | Keep login credentials current; enable biometric login to stay signed in |
| Cloud subscription expired | Cloud storage for cameras; some tracker services | Local recording; devices still detect and alert locally if configured | Cloud uploads stop; some devices lose remote access entirely | Some services email a warning; others just stop working | Set subscription to auto-renew; calendar renewal date manually |
| Sensor hub battery low | Sensors connected to that hub | Standalone devices (cameras, trackers, local-only alarms) | Sensors stop reporting; hub stops sending alerts | Most hubs send low-battery warning via app | Replace batteries when warned; keep spares in the RV; check battery level monthly |
| Tracker subscription inactive | That GPS tracker | Everything else | Tracker stops transmitting location; geofence alerts stop | Some services email a warning; tracker app may show "inactive" | Renew subscription immediately; confirm renewal processed and tracker is back online |
Key takeaway: Local alarms and local recording are the most reliable because they don't depend on internet, cellular, or subscriptions. Remote alerts and remote viewing are convenient but fail more often. Build your system so the local layer works even when connectivity is gone.
Test before you trust: Disconnect shore power and see what stops working. Turn off the house-battery disconnect and check which devices go dark. Let your campground Wi-Fi login expire and see which cameras still record locally. Pull the SIM card from your cellular camera and confirm it saves footage to the SD card. These tests show you what actually happens when something fails, not what you assume will happen.
Build the Right System for Your RV and Travel Pattern
The right security setup depends on how you use your RV. Here are five common scenarios with specific system recommendations:
Travel Trailer Stored at Home or in a Facility
Threat priorities: Trailer moved while you're not there, entry forced, cargo stolen from exterior compartments.
Minimum components:
- Hitch or coupler lock (match your coupler size exactly)
- Entry door lock (keyless or upgraded deadbolt)
- GPS tracker with geofence alert (hardwired or long-life battery)
Useful upgrades:
- Wheel lock or boot (makes moving the trailer much harder)
- Door/window contact sensors with local siren (alerts neighbors or facility staff)
- Exterior camera covering the hitch and entry door (cellular model if no Wi-Fi at storage site)
- Compartment locks for baggage bays and propane access
Usually unnecessary:
- Interior motion sensors (you're not monitoring remotely in most storage scenarios)
- Multiple interior cameras (nothing moves inside a stored trailer)
Power and network assumptions:
- House battery trickle-charged by solar panel or disconnected (most devices run on their own batteries)
- No Wi-Fi (cellular tracker and cameras required if you want remote alerts)
Test frequency: Monthly visit to check tracker battery, test lock operation, verify camera captured recent activity.
Price check as of August 2026: Hitch lock $50-150, entry lock upgrade $150-300, GPS tracker $30-80 plus $10-25/month, wheel lock $60-120, cellular camera $100-200 plus $10-20/month. Basic setup (hitch lock, entry lock, tracker): approximately $230-530 equipment plus $120-300/year subscription.
Storage site rules: Some facilities prohibit wheel locks or require you to keep the hitch accessible. Confirm policies before installing immobilizers. If you are weighing a paid facility against a driveway or open lot, compare indoor vs. outdoor RV storage security before you choose the site.
Motorhome at Trailheads and Sightseeing Stops
Threat priorities: Cab entry (steering column, ignition, visible electronics), living area entry, valuables left inside while you hike or tour.
Minimum components:
- Entry door lock (keyless for quick access when returning)
- Steering-wheel lock (visible deterrent, slows cab access)
- Dash camera with parking mode (records impacts and motion when parked)
Useful upgrades:
- Interior camera covering living area and cab (shows what was accessed)
- Tilt sensor or glass-break sensor on cab windshield (catches forced entry attempts)
- Window contact sensors on accessible side windows
- Exterior camera covering driver's door and entry door
Usually unnecessary:
- Hitch lock (motorhome isn't towable)
- GPS tracker (unless you're parking in high-risk areas for extended periods)
Power and network assumptions:
- Chassis battery powers dash camera in parking mode
- House battery or solar powers other devices
- No reliable cellular or Wi-Fi at remote trailheads (local recording only)
No-signal fallback: Dash camera and interior camera record to SD card. Local siren on entry door works without network. You retrieve and review footage when you return to cell service.
Test frequency: Before each road trip, verify cameras record when parked, entry lock works, steering-wheel lock fits securely.
Price check as of August 2026: Steering-wheel lock $30-70, dash camera with parking mode $80-200, entry lock $150-300, interior camera with SD recording $40-100. Basic setup: approximately $260-570, no recurring subscriptions if using local recording only.
Boondocking With Weak or No Cellular Service
Threat priorities: Entry forced, no cell service to call for help, no nearby campers to hear an alarm.
Minimum components:
- Entry door lock (mechanical or keyless with backup key)
- Local alarm (piezo siren on door contact, battery-powered, 110+ decibels)
- Exterior camera with local SD recording (covers entry and approach)
Useful upgrades:
- Interior camera with local recording (documents what happened if entry occurs)
- Motion-activated exterior lighting (draws attention, helps camera capture faces)
- Window and secondary-door contact sensors (all wired to the same local alarm)
Usually unnecessary:
- GPS tracker (doesn't transmit in dead zones; location is already known because you're staying with the rig)
- Cloud-connected cameras (no network to upload footage)
- Remote monitoring subscriptions (no signal to receive alerts)
Power and network assumptions:
- House battery (charged by solar or generator)
- No cellular or Wi-Fi (everything runs locally)
- Cameras record to SD cards with 128GB to 256GB capacity (one to four weeks of motion-triggered footage)
Test frequency: At the start of each boondocking trip, trigger the alarm, verify cameras record day and night, check SD card free space.
Price check as of August 2026: Entry lock $150-300, piezo siren and door contact $25-60, outdoor camera with SD recording $60-150, motion lights $20-80 per fixture. Basic setup: approximately $255-590, no recurring costs.
Lighting discipline: Exterior lights and visible movement in the windows tell people you're home. An empty-looking RV is a target.
Check-in plan: If you're boondocking alone for more than 48 hours, give someone your GPS coordinates and a check-in schedule. No security system replaces having someone who expects to hear from you.
Full-Time RV With Pets
Threat priorities: Intrusion monitoring while you're running errands, package theft from outside, temperature monitoring for pet safety.
Minimum components:
- Entry door lock with access log (keyless, shows who came and went)
- Interior camera with two-way audio (check on pets, see entry events)
- Pet-immune motion sensors (detect human movement, ignore pets up to 40-80 pounds depending on model)
Useful upgrades:
- Exterior camera covering package drop-off zone
- Temperature sensor with app alerts (warns if HVAC fails and interior overheats or freezes)
- Smoke, carbon monoxide, and propane detectors (life safety, not intrusion security, but critical for full-timers)
- Compartment locks on exterior bays (tools and supplies are tempting targets)
Usually unnecessary:
- Hitch lock (you're with the rig or it's at a full-hookup site)
- GPS tracker (location is known; rig isn't moving unattended)
Power and network assumptions:
- Shore power with battery backup (you're at a campground or RV park most of the time)
- Wi-Fi or cellular hotspot (remote alerts and camera viewing work)
Emergency contact access: Give a trusted friend or neighbor a backup door code or key. If you're injured or hospitalized, they need to reach your pets and shut down the RV safely.
Test frequency: Monthly trigger of motion sensors with pets in the room (verify pet immunity works). Quarterly test of temperature alerts (set threshold below current temp, confirm alert arrives).
Price check as of August 2026: Entry lock with app $150-300, interior camera with audio $60-150, pet-immune motion sensor $40-80 each, exterior camera $80-200, temperature sensor $30-70. Basic setup: approximately $330-800 plus $0-20/month for cloud storage.
Privacy boundaries: Interior cameras point at entry zones and common areas, not sleeping or bathroom areas. Discuss with everyone who lives in the RV where cameras are and where they're not.
Life safety is separate from intrusion security: Smoke, CO, and propane detectors are required safety equipment, not part of the security system. RV-rated detectors, tested monthly, with a practiced escape plan. The US Fire Administration's RV fire-safety guidance and the National Park Service's RV Fire Safety 101 guide cover detector checks, escape planning, and fire prevention.
Seasonal Camper With Long Unattended Periods
Threat priorities: Entry or vandalism during weeks or months when the RV sits unused, battery drain, subscription lapses causing loss of monitoring.
Minimum components:
- Entry door lock (keyless, check battery remotely if supported)
- GPS tracker with geofence alert (hardwired to house battery with solar trickle charger)
- Exterior camera with cellular connection (monitors entry and perimeter)
Useful upgrades:
- Door/window sensors with hub that sends alerts (catches secondary entry points)
- Local siren (alerts campground staff or neighboring seasonal campers)
- Battery monitor (alerts you when house battery is low, before security devices die)
Usually unnecessary:
- Interior motion sensors (unless vandalism or squatter activity is a known problem)
- High-frequency tracker updates (once-per-day check-in is sufficient; saves battery)
Power and network assumptions:
- House battery with solar panel (keeps devices powered during months-long absences)
- Cellular connection (campground may not offer reliable Wi-Fi, or winter shutdown kills it)
Subscription continuity: Calendar every subscription renewal date. GPS tracker, cellular camera data plan, cloud storage, and monitoring service all have to stay active. One lapsed subscription means one silent component.
Periodic inspection: Visit in person or have a trusted local contact check the rig every 4-6 weeks. Verify battery charge, test lock operation, review camera footage, check for leaks or pest activity, run generator if applicable.
Alert escalation: Set up alerts to go to a nearby trusted contact (campground host, neighboring seasonal camper, local friend) who can respond faster than you can if you're hours away.
Moisture and temperature limits: Most cameras and sensors operate reliably between 32°F and 110°F. Below freezing, battery life drops and some devices stop working. Above 110°F (inside a closed RV in summer sun), electronics fail. If your RV will sit through temperature extremes, verify every device's operating range from its manual.
Test frequency: Before you leave for the season, run a full commissioning test (covered below). Visit or have someone check monthly. Return a few days early before your first planned trip to verify everything still works.
Price check as of August 2026: Entry lock $150-300, GPS tracker $30-80 plus $10-25/month, cellular camera $100-200 plus $10-20/month, door/window sensor hub kit $150-300, battery monitor $50-150. Basic setup: approximately $430-880 equipment plus $240-540/year subscriptions.
System Builder Worksheet
Use this to design your setup before you buy anything:
Rig Details:
- RV type (travel trailer, fifth-wheel, Class A, Class B, Class C): ___________
- Primary location when unattended (storage, campground, driveway, boondocking): ___________
- Typical unattended duration (hours, days, weeks): ___________
Threat Assessment:
- Top 3 threats in priority order: 1) ___________ 2) ___________ 3) ___________
Layer Selections:
- Physical layer (locks, immobilizers): ___________
- Detection layer (sensors, local alarm): ___________
- Verification layer (cameras, recording): ___________
- Recovery layer (GPS tracker): ___________
Power and Network:
- Primary power source (shore, battery, solar): ___________
- Backup power (yes/no, what type): ___________
- Network available (none, Wi-Fi, cellular, both): ___________
Costs:
- Equipment budget (one-time): $___________
- Subscription budget (monthly): $___________
- Acceptable recurring cost (annual): $___________
Maintenance:
- Test schedule (before each trip, monthly, quarterly): ___________
- Battery replacement reminder (set calendar alert): ___________
- Subscription renewal dates: ___________
Emergency Contacts:
- Who has backup access (name, phone): ___________
- Who gets alerts if you're unreachable (name, phone): ___________
- Local law enforcement non-emergency (phone): ___________
- Insurance claim contact (phone, policy number): ___________
Plan Device Placement Before You Drill or Stick Anything
Where you put each device determines what it can see, whether it survives weather, and whether you accidentally block an emergency exit. Map it out before you mount anything.
Zone map (top-down view of your RV):
- Main entry door
- Secondary doors (cab, rear, side)
- Emergency exits (roof vents with egress, windows marked as exits)
- Large accessible windows
- Exterior compartments (baggage, generator, propane)
- Hitch or front axle (towables)
- High-value interior zones (electronics, safes, storage areas)
- Approach paths (driveway, campsite road)
Installation worksheet for each device:
| Device | Zone | Field of View / Coverage | Blind Spots | Weather Exposure | Vibration Risk | Cable Routing | Adhesive Compatible | Service Access | Emergency-Egress Impact | Privacy Boundary |
|---|---|---|---|---|---|---|---|---|---|---|
| Entry camera | Front door | 110° covers door and 3 steps | Underside of step | Rain, direct sun | Low | Through door frame | Test on fiberglass | Accessible from outside | None | Faces public approach |
| Interior camera | Living area | 90° covers entry and hallway | Kitchen, bedroom | None | Low | Along ceiling to power | Test on vinyl ceiling | Requires ladder | None | Does not point at sleeping area |
Camera field of view: Wide-angle (110° to 130°) covers more area but distorts faces at the edges. Narrow (60° to 90°) gives clearer facial detail but misses activity to the sides. Check sample footage from the manufacturer to see what faces look like at 10 feet, 20 feet, and the edges of the frame.
Blind spots: Cameras can't see around corners, under slides, or through objects. Walk the perimeter and identify what each camera misses. A two-camera setup (one covering the entry, one covering the opposite side) catches more than a single camera aimed at the door.
Weather exposure: Rain, direct sun, freezing temps, and road salt. Outdoor cameras need IP65 or IP66 ratings and weatherproof cable connections. Cameras under awnings or slide-outs stay drier but have limited view angles. Cameras on the roof see farther but take more abuse.
Vibration and road shock: Adhesive-mount devices on flexible panels (fiberglass, thin aluminum) may shake loose on rough roads. Use mechanical fasteners (screws into solid backing) for critical devices. Test a short drive after installation and check that nothing has shifted.
Cable routing: Run cables through existing holes (slide cable covers, plumbing pass-throughs) when possible. Drilling new holes through the RV sidewall risks hitting wiring, plumbing, or structural members. If you must drill, check both sides of the wall for hidden obstacles and seal the hole with appropriate RV sealant (Dicor, Sikaflex) to prevent leaks.
Adhesive compatibility: VHB tape and sensor adhesive sticks to smooth fiberglass and painted aluminum. It fails on textured surfaces, rubber roofs, and dusty walls. Clean the surface with isopropyl alcohol and let it dry fully before applying adhesive mounts. Test with a spare mount or similar tape on the same surface type and wait 24 hours to verify it holds.
Service access: Cameras and sensors need occasional battery replacement, SD card removal, or firmware updates. Mount them where you can reach them without a ladder, or accept that you'll need a ladder for maintenance.
Emergency-egress impact: Never mount a device that blocks or interferes with opening an emergency exit window, roof vent, or secondary door. If the rig catches fire or you need to evacuate fast, every second counts.
Tamper risk: Cameras and sensors mounted within arm's reach from outside can be disabled. Mount them high, under overhangs, or inside locked compartments when possible. Interior cameras can't be reached from outside.
Privacy boundaries: Cameras covering entry zones and common areas are one thing. Cameras aimed at sleeping areas, bathrooms, or neighboring campsites are another. Discuss boundaries with everyone who lives in or visits your RV. Campground rules and state laws vary on recording audio and video. When in doubt, point cameras at your own property and entry points, not other people's sites.
Commission and Test the System Before Every Trip
A security system you haven't tested is a security system you can't trust. Here's a 15-minute initial commissioning procedure and a five-minute departure-day checklist.
Initial 15-Minute Commissioning Test (Two-Person Recommended)
Run this when you first install the system, after any major changes, and at least once per season if the RV sits unused.
Step 1: Verify power and connectivity (3 minutes)
- Confirm shore power or battery voltage is adequate
- Check that cameras, sensors, and hub all show "online" or "connected" status in their apps
- If cellular devices: verify signal strength at the installation location
- If Wi-Fi devices: verify they're connected to the network and can reach the internet
Step 2: Trigger every sensor and time the alerts (5 minutes)
- Person 1 stays inside with phone and watches for alerts
- Person 2 goes outside and triggers each sensor one at a time: open the entry door (door contact), tap on a window (glass-break sensor), walk past the motion sensor, rock the RV slightly (tilt sensor)
- Person 1 notes the alert delay for each sensor (immediate, 5 seconds, 30 seconds, never arrived)
- If an alert doesn't arrive or takes longer than 30 seconds, troubleshoot that sensor before moving on
Step 3: Confirm siren and test audio level (2 minutes)
- Trigger the alarm (open the door with the system armed, or use the test button if your hub has one)
- Measure how loud the siren is at 50 feet and 100 feet
- Can you hear it clearly across a typical campground with normal background noise?
- If not, add a second siren or upgrade to a louder model (110+ decibels)
Step 4: Verify day and night camera footage (3 minutes)
- Walk past each camera during daylight and verify the footage shows clear facial detail at 10 feet and 20 feet
- After dark, repeat the walk and check night vision quality (can you identify a face, or just a glowing blob?)
- Review sample clips for distortion, glare from nearby lights, and blind spots
Step 5: Test failure modes (5 minutes)
- Disconnect shore power or turn off house-battery disconnect switch and verify which devices stop working
- Turn off Wi-Fi router and confirm which cameras still record locally
- Sign out of the mobile app and verify local siren still triggers
- Restore power and connectivity, confirm everything comes back online
Step 6: Confirm tracker location and geofence (2 minutes)
- Open the GPS tracker app and verify it shows the RV's current location accurately (within 30 feet)
- Set or verify the geofence boundary
- If the tracker has a test mode, trigger a geofence alert and confirm the notification arrives on your phone
Step 7: Test backup access and emergency power (2 minutes)
- Use the mechanical backup key to unlock the entry door (verify the key works and you know where it's stored)
- If your lock has an emergency power port, test that a 9V battery can power it temporarily
- Document the emergency unlock procedure and keep a printed copy in your truck or with your RV documents
Step 8: Document and share recovery contacts (3 minutes)
- Confirm your mobile app login credentials are current and saved in your password manager
- Note the customer service number for each device (GPS tracker, camera, alarm hub)
- Give a trusted contact the information they need to access your tracker and camera footage in an emergency (login, password, or share access through the app if supported)
Total time: approximately 25 minutes with two people, 35 minutes alone.
Five-Minute Departure-Day Checklist
Run this before every trip or extended absence:
- Trigger the entry door sensor (open and close the door) and confirm you receive an alert on your phone (30 seconds)
- View live footage from one exterior camera and one interior camera to verify they're recording (1 minute)
- Check battery levels in cameras, sensors, and tracker apps (1 minute)
- Open the GPS tracker app and confirm current location is accurate and geofence is active (1 minute)
- Arm the alarm system, lock the entry door, and walk 100 feet away to confirm the siren is audible if triggered (1 minute)
- Verify your phone has the mobile apps installed, you're signed in, and notifications are enabled (30 seconds)
If anything fails the departure-day checklist, do not rely on that component until you fix it. Run the full commissioning test again after repairs.
Do not stage dangerous tests: Never simulate a forced entry by prying, striking, or damaging your RV to test sensors. Use the manufacturer's test mode, trigger sensors with normal opening or tapping, and rely on documented specifications for forced-entry detection.
Calculate the True First-Year Cost
Security systems cost more than the sticker price. Here's how to calculate what you'll actually spend in the first year:
First-year cost = equipment + installation + 12 months of required services + power and storage accessories + maintenance supplies
Equipment (One-Time Costs)
| Item | Price Range (August 2026) |
|---|---|
| Entry door lock (keyless) | $150 - $300 |
| Hitch or coupler lock | $50 - $150 |
| Wheel lock or boot | $60 - $120 |
| Steering-wheel lock | $30 - $70 |
| Door/window sensor (each) | $25 - $50 |
| Motion sensor | $40 - $80 |
| Glass-break sensor | $45 - $90 |
| Vibration/tilt sensor | $35 - $70 |
| Alarm hub (with 3-5 sensors included) | $150 - $300 |
| Piezo siren (standalone) | $25 - $60 |
| Wi-Fi camera (battery) | $60 - $200 |
| Wi-Fi camera (plug-in) | $40 - $150 |
| Cellular camera | $100 - $250 |
| 12-volt wired camera system (4-camera kit with DVR) | $200 - $600 |
| GPS tracker (cellular) | $30 - $80 |
| Motion-activated lighting (per fixture) | $20 - $80 |
Installation (One-Time or DIY)
Most RV security components are DIY-friendly. Entry door locks require basic hand tools (screwdriver, drill, measuring tape) and take 30 to 90 minutes if your door already has the right cutout. Adhesive-mount sensors and battery-powered cameras need no tools. Hardwired cameras and trackers connected to 12-volt systems may need professional installation if you're not comfortable routing cables or tapping into the electrical system.
Professional installation cost (if needed): $100 to $300 for a full system, depending on complexity and local labor rates. Ask the installer to document what they connected, take photos, and explain how to test each component.
Required Recurring Services (12-Month Total)
| Service | Monthly Cost | Annual Total |
|---|---|---|
| GPS tracker cellular subscription | $10 - $25 | $120 - $300 |
| Cellular camera data plan | $10 - $20 per camera | $120 - $240 per camera |
| Cloud storage for Wi-Fi cameras | $3 - $10 per camera | $36 - $120 per camera |
| Professional monitoring service (optional) | $15 - $50 | $180 - $600 |
What's required versus optional: GPS trackers need an active cellular subscription to transmit location. Cellular cameras need a data plan. Cloud storage for Wi-Fi cameras is optional if you're using local SD card recording. Professional monitoring (a service that calls you or emergency contacts when alarms trigger) is optional; most RV owners monitor their own systems through mobile apps.
Power and Storage Accessories
| Item | Price Range (August 2026) |
|---|---|
| AA batteries (4-pack for locks and sensors) | $8 - $15 |
| Battery backup for Wi-Fi router | $40 - $100 |
| Solar panel trickle charger (10W - 20W) | $30 - $80 |
| SD memory cards (128GB - 256GB per camera) | $15 - $40 each |
| Cable management and weatherproof connectors | $10 - $40 |
Maintenance Supplies (Annual)
Budget approximately $50 to $100 per year for replacement batteries (locks, sensors, cameras), SD card replacements (cards fail after 1-2 years of continuous recording), adhesive re-mounting supplies, and sealant for any drilled holes.
Example Total Cost Scenarios
Basic storage setup (hitch lock, entry lock, GPS tracker):
- Equipment: $230 - $530
- Installation: DIY ($0)
- Subscriptions (12 months): $120 - $300
- Accessories: $25 - $60
- First-year total: $375 - $890
Mid-level touring setup (entry lock, sensors, cameras, local alarm):
- Equipment: $550 - $1,200
- Installation: DIY or $100 - $200 professional
- Subscriptions (12 months): $36 - $240 (cloud storage optional)
- Accessories: $50 - $120
- First-year total: $636 - $1,760
Comprehensive full-timer setup (entry lock, multiple cameras, alarm hub, tracker, monitoring):
- Equipment: $900 - $2,200
- Installation: $100 - $300 professional
- Subscriptions (12 months): $336 - $1,140
- Accessories: $100 - $200
- First-year total: $1,436 - $3,840
Prices collected from manufacturer websites and major retailers (Amazon, Camping World, Home Depot) on August 16, 2026. Prices exclude sales tax and shipping. Promotional discounts and bundle deals may lower costs temporarily but should not be factored into planning unless you're buying immediately.
Do not rely on national averages: System costs vary widely based on RV type, component selection, and whether you need professional installation. Use the worksheet above to calculate your specific setup.
Keep Intrusion Security, Life Safety, and Privacy Separate
Intrusion security (locks, alarms, cameras, trackers) is one system. Life safety (smoke, carbon monoxide, propane detection, fire extinguishers, escape planning) is another. They serve different purposes and need different equipment.
| Purpose | Equipment | Action Owner |
|---|---|---|
| Intrusion security | Entry locks, sensors, cameras, alarms, GPS trackers | You (or monitoring service) respond to alerts; law enforcement handles recovery |
| Life safety | Smoke alarms, carbon monoxide alarms, propane detectors, fire extinguishers, escape ladders, emergency exit markings | You (and everyone in the RV) execute the escape plan immediately; call 911 from outside |
| Privacy | Camera placement boundaries, audio recording disclosures, compliance with campground and state recording laws | You (disclose cameras to guests, follow local laws, respect neighbors' space) |
Intrusion security does not replace life safety: A security camera does not detect smoke, carbon monoxide, or propane leaks. An entry sensor does not wake you up when the RV is on fire. Smoke, CO, and propane detectors are required safety equipment in RVs, tested monthly, with working batteries. Fire extinguishers (10-B:C rated minimum) mounted near the exit, the kitchen, and the furnace. An escape plan practiced with everyone who travels in the RV, including a primary exit and a secondary exit if the first is blocked.
The US Fire Administration and National Park Service publish detailed RV fire-safety guidance covering detector placement, escape planning, and fire prevention. Read the USFA recreational-vehicle fire-safety page and NPS RV Fire Safety 101 before you mount equipment near an exit.
Camera and audio recording rules vary: Some states require two-party consent to record audio. Some campgrounds and RV parks prohibit exterior cameras or require them to point only at your own site. Doorbell cameras and exterior cameras that capture neighboring sites may create privacy conflicts. Before you install cameras, check local laws and campground rules. Point cameras at your own entry points and property, not your neighbors' sites or common areas.
This article is not legal advice: If you have questions about recording laws, firearm storage in your RV, or other legal topics, consult an attorney licensed in your state.
Common RV Security System Mistakes
These are the six mistakes I see most often, and the fix for each:
1. Buying devices before defining threats. You don't need every component. Figure out what you're actually trying to prevent (entry while stored, cab access at trailheads, package theft at campgrounds), then buy only the layers that address those specific risks. For real-world context before you rank those threats, review these real RV theft lessons. Fix: Start with the threat assessment and system builder worksheet above.
2. Depending on one layer. A lock alone doesn't alert you. An alarm alone doesn't record evidence. A camera alone doesn't stop movement. Each layer covers what the others miss. Fix: Build at least two layers (lock plus alarm, or lock plus camera, or alarm plus tracker).
3. Assuming Wi-Fi means remote access. Many "Wi-Fi cameras" only work on your local network. Campground Wi-Fi with captive portals, weak signal, or blocked ports may prevent remote viewing and alerts. Fix: Test remote access on the actual campground network before relying on it, or use cellular cameras for exterior monitoring.
4. Hiding a tracker without testing its signal. A GPS tracker buried in a metal compartment or wrapped in insulation may not get a clear view of satellites or cellular towers. Location updates fail or stop entirely. Fix: Install the tracker in its intended location, then verify signal strength and location accuracy from the tracker app before you finalize mounting.
5. Blocking emergency egress. A camera, sensor, or cable routed across an emergency exit window or roof vent can cost you seconds when the RV is on fire or you need to evacuate. Fix: Map all emergency exits before you mount anything, and keep them clear.
6. Ignoring subscriptions and batteries. A GPS tracker with a lapsed subscription is silent. A camera with a dead battery records nothing. Sensors with depleted batteries stop reporting. Fix: Calendar every subscription renewal date and battery replacement reminder. Set low-battery alerts in every app that supports them. Check battery levels monthly.
RV Security System FAQs
Do RV security systems work without Wi-Fi?
Yes, but what works depends on the components. Local alarms (piezo sirens wired to door contacts) and cameras with SD card recording operate without any network connection. Sensors that send alerts to your phone need Wi-Fi or cellular to transmit. GPS trackers require cellular service to report location. Build the system so the most critical functions (local alarm, local recording) work even when connectivity is gone, and treat remote alerts as a bonus.
Can a home security system be used in an RV?
Some components work, others don't. Battery-powered door/window sensors, motion detectors, and cameras designed for home use can work in an RV if they tolerate vibration, temperature extremes, and voltage fluctuations. Hardwired systems that require 120V AC power only function when you're on shore power or running an inverter. Professional monitoring services designed for fixed addresses may not support mobile RVs. Check temperature ratings, power requirements, and whether the hub works on cellular backup before adapting home security gear.
Is a camera or alarm more important?
Depends on your threat. An alarm (local siren) draws immediate attention and may scare off someone attempting entry. A camera records evidence but doesn't physically stop anyone. If you're parked in a populated campground where neighbors can respond to a loud siren, the alarm is more useful. If you're in long-term storage where no one's nearby to hear it, a camera that captures faces and a GPS tracker that reports movement matter more. Build both if your budget allows.
What is the difference between a GPS tracker and an AirTag?
A GPS tracker uses satellite positioning and a cellular connection to report your RV's location to the cloud at intervals you set. It works anywhere with cellular coverage and updates as frequently as every few minutes. An Apple AirTag uses Bluetooth and the Find My network (nearby iPhones) to report approximate location. It does not have GPS or cellular, and it depends on other people's devices being nearby to relay its position. AirTags are designed for finding lost keys or bags in populated areas, not tracking stolen vehicles in remote locations. Use a dedicated GPS tracker with its own cellular subscription for RV recovery.
How often should I test the system?
Full commissioning test (trigger every sensor, verify alerts, test day and night footage, check failure modes): at installation, after any changes, and at least once per season if the RV sits unused. Departure-day checklist (trigger entry sensor, view live camera, check battery levels, verify tracker location, confirm siren audible): before every trip or extended absence. Monthly: check battery levels in all devices, verify subscription status, test backup key. The system you don't test is the system that fails when you need it.
Build in Layers, Then Test the Weakest Link
A working RV security system starts with knowing what you're trying to prevent. Define the threat, add complementary layers that each handle a different job, verify that components fit your rig and match your power and network reality, test the failure modes so you know what stops working when something fails, and maintain the setup with regular battery checks and subscription renewals. No system prevents all theft, but a tested, layered approach makes your RV harder to access, harder to move, and more likely to be recovered than the one parked next to it.
Start with the physical layer (locks and immobilizers), add detection (sensors and alarms), verify events with cameras, and enable recovery with a GPS tracker. Test it before you trust it, and re-test after every change.
For broader RV security guidance covering parking decisions, valuables management, and theft prevention, see the complete RV security guide.
Sources:
- Security.org RV security systems comparison
- SafeHome.org RV security systems guide
- Reolink RV security cameras guide
- Smart RV Hub security systems overview
- MyWaggle RV security upgrades guide
- Hialeah Police Department auto-theft prevention guidance
- Washington, DC Metropolitan Police auto-theft prevention guidance
- US Fire Administration recreational-vehicle fire-safety guidance
- National Park Service RV Fire Safety 101
- Apple AirTag technical support page
- ONNAIS Guard Smart RV Keyless Entry Door Lock product page